Showing posts with label Bread. Show all posts

Thursday, October 8, 2009

Butternut Squash Olive Oil Bread


Guess what I've been eating a lot of?

I'm a bit nervous that I'll eat way too much winter squash this month and be sick of it by the time the late summer vegetables are gone and I'm faced with the prospect of eating butternut squash and sweet potatoes for several long, cold months. But I also feel like I've been waiting for winter squash season all year, and I am willing to risk butternut overload for mornings like this.

I woke up this morning and immediately thought BREAD. I haven't made bread in many months of Sundays. What with the summer of living on the road, to starting school and moving into a new, unfamiliar house with an extremely temperamental oven, it's no surprise that bread hasn't been first on the to-do list. But I miss it, and Julia, my sexy stand mixer, keeps making me feel guilty for using her as squash storage. Hey, sorry love, but counter space is precious and you have a really large bowl. 6 quarts to be exact. So I thought I'd make it up to her AND make the squash storage problem a bit less insane in one fell swoop. Butternut squash bread! How cool is that?

INGREDIENTS
• 2 (.25 ounce) packages active dry yeast
• 1/2 cup warm water (110 degrees F to 115 degrees F)
• 1 1/4 cups mashed, cooked butternut squash
• 1 cup warm milk (110 to 115 degrees F)
• 2 eggs, beaten
• 1/2 cup olive oil, canola oil, or mixture of both
• 1/3 cup honey, maple syrup, or agave
• 1 teaspoon salt
• 7 cups all-purpose flour

DIRECTIONS
In a mixing bowl, dissolve yeast in water; let stand for 5 minutes. Add squash, milk, eggs, oils, syrup and salt; mix well. Gradually add 3-1/2 cups flour; beat until smooth. Add enough remaining flour to form a soft dough. Turn onto a floured surface; knead until smooth and elastic, about 6-8 minutes. Place in a greased bowl, turning once to grease top. Cover and let rise in a warm place until doubled, about 1 hour. Punch dough down. Shape into three loaves; place in greased 8-in. x 4-in. x 2-in. loaf pans. Cover and let rise until doubled, about 30 minutes. Bake at 375 degrees F for 25-30 minutes or until tops are golden. Remove from pans to cool on wire racks.

Thursday, July 9, 2009

Best Zucchini Bread Ever


Every vegetable enthusiast has a special place in her heart for the humble zucchini bread. It's one of those cherished ways to make a dent in the inevitable onslaught of summer squash, and it's always fun to sneak healthy (green!) food into baked goods. The only problem is that most zucchini breads have a lot of white. White flour and white sugar, that is. It's really hard to find a recipe that uses 100% whole wheat flour, people just seem afraid that the result will be inedible without some refined, bleached flour. In the pursuit of a healthier, happier zucchini bread, I decided to take on those critics. Also, I still have the better half of a 50 lb bag of whole wheat flour in my kitchen cupboard. Full disclosure.

I'm not going to lie, I'm really proud of this recipe. It was, as these things have been going lately, greatly accidental, but this time I measured my ingredients and was rewarded with something well worth making and passing on. In addition to using only whole wheat flour, I used maple syrup instead of white sugar, and I used a combination of fats - good cream butter and some raw coconut oil, melted down and mixed with fresh eggs. I added the zest and juice of one lemon (note to parents: bring more lemons when you visit, I'm almost out! And some figs, while you're at it!). It's all pretty simple, but, trust me here, this is the best zucchini bread ever. Hands down. And packed into the whole-wheat,maple-y goodness is 3 packed cups of grated zucchini. I don't really know what made it so good, but it's moist, decadent, and just the right mount of sweet. I think this will become a summer staple around my house, and it should freeze really well.

Lesson learned, we shouldn't be afraid of 100% whole wheat. It can lead to some pretty fabulous recipes.

Eat well!


100% Whole Wheat Maple Zucchini Bread
3 Eggs
1/2 cup melted butter
1/2 cup raw coconut oil, melted
1 1/4 cup real maple syrup
Zest and Juice of 1 Lemon
3 cups well packed Shredded Zucchini
2 1/2 cups Whole Wheat Flour
1/2 tsp Salt
1 tsp Cinnamon
1 tsp Baking Soda
1/2 tsp Baking Powder

Preheat oven to 325.

In a large bowl, beat eggs, butter, oil, lemon zest, lemon juice, and syrup together. In a separate bowl, whisk the flour, salt, cinnamon, baking soda, and baking powder. Stir the dry ingredients into the wet and fold in the zucchini.

Pour batter into two greased 9 inch loaf pans. Bake 50 minutes or a tester comes out clean. Enjoy!

Friday, March 20, 2009

Cinnamon Apple-Raisin Oat Bread


According to my National Parks Calendar and the definitive Google homepage, today is the first day of Spring!

Here in Portland, the sun has been taking turns with the rain, and there is a distinctive honesty to the air that tempts your nose with traces of winter daphne and fireplace smoke. The daffodils are out if full force, standing guard in small battalions around the city and along my walk to the store. I bought a dollar bag of organic Columbia Gorge Fujis at Limbo this week, thinking they would tide me over until the inevitable produce splurge that will be tomorrow's farmers' market. Unfortunately, the apples were a bit past their prime, which explains how I got 10 for a buck. As I'm sure many of you know, an ugly fruit has never stopped me, so I made a HUGE batch of Cinnamon Raisin bread (three big loaves) and added a few cups of diced apples for extra sweetness and texture. It's hard to go wrong with a good cinnamon bread, and the house smells almost as good as the air outside.

For some reason this dough did not want to rise, but the resulting bread was pleasantly hearty without being too dense. I used all-purpose flour instead of bread flour, but It's probably for the best, because a lighter crumb would have fallen apart in the toaster, and this bread begs to be toasted. Also, the recipe measurements are a bit wonky, as I had to convert them from metric quantities. Someday I'll get a kitchen scale, but for now, my haphazard measuring-cup methods aren't causing too many disasters.

I've got two loaves saved for a breakfast-for-dinner part tonight, complete with some honey-cinnamon butter I made by setting a stick of butter near the kitchen window, adding a few tablespoons of honey, two teaspoons of cinnamon, and mixing. Simple, yes, but this tastes SO good on the toasted bread, with the sweet bits of raisin and apple scattered through the slice.

The rest of the apples will be used to make a caramel apple pancake topping, which will be a sort of farewell to the winter flavors I've loved for the past few months before I set of for a greener palate.

Hope to see you at the market tomorrow, and I would love to hear about the signs of spring where you live, culinary or otherwise. Eat Well!

Cinnamon Apple-Raisin Oat Bread
Adapted from Jeffrey Hamelman's Bread
Makes 3 loaves
5 1/2 cups bread or all-purpose unbleached flour
1 7/8 cups whole wheat flour
1 5/8 cups rolled oats
2 1/2 cups water, divided into 2 cups and 1/2 cup
3/8 cups half-and-half or milk
3 tablespoons honey
5 1/2 tablespoons vegetable oil
1 tablespoons plus 1/2 teaspoon salt
1 1/4 tablespoon dry active yeast
2 tablespoons ground cinnamon
1 cups soaked and drained raisins
1 1/2 cups diced apples

While you measure and mix the other ingredients, soak the raisins in warm water. Next, soak the oats in a large bowl in the 2 cups water for 20 to 30 minutes. Proof the yeast in the remaining 1/2 cup warm water for about 7 minutes. Mix the flours, yeast, milk, honey, oil, salt, and cinnamon into the oats. Mix well, until all of the flour is hydrated. Knead by hand for 5 minutes or in a standmixer for 3, then mix in the drained raisins. Knead or mix until the raisins are distributed throughout the dough.

Cover the bowl of dough and allow it to rise for 1 hour. Then remove the dough from the bowl and fold it, deflating it gently as you do. Place the dough on a floured work surface, top side down. Fold the dough in thirds, like a letter. Fold in thirds again the other way. Flip the dough over, dust off as much of the raw flour as you can, and place it back into the bowl. Cover the bowl and allow the dough to rise in bulk again for another hour. Then divide the dough in thirds and shape the loaves. Place each shaped loaf into a greased bread pan. Spray or gently brush each loaf with water and sprinkle with some more oats. Cover the pans and set aside to rise until the loaves crest above the edge of the pans, roughly 90 minutes. Preheat the oven to 450. Place the loaves in the center rack of the oven. After 5 minutes, reduce the oven temperature to 375. Rotate the loaves 180 degrees after 20 minutes, and bake for another 15 to 25 minutes, until the tops of the loaves are nicely browned, the bottoms of the loaves make a hollow sound when tapped. Cool before slicing.

Saturday, December 20, 2008

Acorn Squash, Two Ways


We had a brief respite from the "arctic onslaught" yesterday, and I was able to zip around and get some errands done, enjoying the sun (!) around Portland. But, much to my delight, I woke up this morning to white flurries riding the wind outside my bedroom window - and a few inches on the ground. I'm so in love with snow, that I really don't mind that Portland ceases to function under these conditions. It means more time to read, more time to finish holiday presents, and more time to cook!

This morning's Farmers' Market would have been all about winter squash - the sturdy champion of these wintry days and nights - and I'm pretty sad I didn't get a chance to thank all of my favorite farmers for a great year. I thought I'd commemorate the end of market season by roasting a sweet little acorn squash, and proving that these guys are a food of many hats by doing a savory and sweet rendition for each half.

For the savory side, I crafted an open-faced sandwich using fresh Tuscan Peasant Bread that I made this morning. If you couldn't tell, I'm having the time of my life baking every day. I'm usually running around Portland, hopping from one task to another, that the though of making bread seems like an indulgence I don't have the time for, seeing as I'm rarely in the house for a few consecutive hours. But this week, what with this lovely winter weather that has shut down the city, I've got all the time in the world - what's a two hour rising time when I'm snowed in for the whole day?


Plus, I was able to roast my squash in the oven while the bread was baking. Hooray for multitasking. I didn't do anything fancy with the acorn squash - just cut it in have, scooped out the pulp, and dotted each with a pat of butter and some kosher salt. I nestled the halves into a shallow pie pan filled with about a half inch of water. The bread was baking for an hour at 425 degrees, so I left the squash in for the same amount of time. It's kind of hard to screw up winter squash.


I used Beth Hensperger's Tuscan Peasant Loaf recipe from (where else?) the Bread Bible, though I like to add a touch more salt and replace the sugar with honey. This bread has a great crust and a dense crumb - perfect for sandwiches! I took two big slices of the bread, brushed on a bit of olive oil and rubbed the slices with garlic. I layered on roasted zucchini, slices of one half of the acorn squash, and some slices of really good local havarti from Willamette Valley Cheese Company - my absolute favorite cheese - and popped it under the broiler for a minute, until the cheese was golden and the bread was toasty.

I mixed up some halved kalamata olives, capers, and balsamic vinegar to drizzle over the top. Yum. The zucchini, squash, and cheese melted together to a really creamy consistency, perfectly set off by the crunchy bread. This was SO filling, I had to put a half back in the fridge for later. I'm sure it will be just as good in a few hours.


For the sweet side, I called upon my mom's old trick to get us to eat banana squash - her's and everyone else's moms' - by sprinkling the other half with brown sugar and cinnamon. Nothing to it - creamy, sweet, a little salty, and a perfect accompaniment to the open-face sandwiches. No one could complain that it was the same ingredient twice - and it's a treat that would get anyone through a winter of squash!


Eat Well!

Friday, December 19, 2008

Challah French Toast with Sauteed Apples


Ah, winter bliss. Finals are over, and I'm snowed in with plenty of time to bake in a warm kitchen. Honestly, I don't know how these few days of vacation could get any better. Oh wait, yes I do - Challah! I adore making challah. There's something so satisfying about putting together a few simple ingredients and making something that tastes just right every time. It's such a familiar taste, sweet, eggy, fluffy bread - with a bit of honey it tastes like every great challah I've ever had.


With the snow falling outside, I'm just about falling apart with happiness. Portland is really beautiful in the snow, though I have to admit I haven't seen much of it. I have this fear of being in vehicles in the snow, so I've been stuck within a mile's radius of my house since last weekend. Luckily, everything I need is within walking distance, and it's really fun to get all bundled up to walk like a penguin to the coffee shop for hot chocolate while my bread rises.

I used my no-fail challah recipe from Beth Hensperger's Bread Bible. EVERYONE who wants to dabble in home bread baking needs this book, and since I didn't change the recipe at all, I'll encourage you to go find your own copy. Hint - it's also on google books.

Plus, when you make challah, that means you get to make challah french toast! I'm STILL working my way through a big box of apples (yes, the same apples from the great Thanksgiving Pie Event). Winter fruits and vegetables are miracles, honestly. Anyway, I thought I'd make a sauteed apple syrup for my french toast, and it turned out so well, especially with a bit of creamy yogurt. I'll make it through this winter, farmers market or not. If every morning could be like this morning, I don't think I'd have any problems at all.


Stay warm, drive safely and eat well!

Here's the recipe for my challah french toast. Perfect thing for a lazy, snowy morning.

Challah French Toast with Sauteed Apples

Ingredients
5 eggs
1 cup half-and-half or milk
1/2 teaspoon pure vanilla extract
1 large loaf challah
Unsalted butter
Vegetable oil

For topping:
4 large apples
1/2 cup sugar
1 teaspoon cinnamon
2 tablespoons butter

Optional: greek yogurt, whipped cream, Crème fraîche, or vanilla ice cream, if you dare.

Directions
Preheat the oven to 250 degrees F.

In a large bowl, whisk together the eggs, half-and-half, and vanilla. Pour mixture into shallow container, like a pie pan or deep plate. Slice the challah into thick slices, and soak slices in the egg mixture for 5 minutes, turning once.

Heat 1 tablespoon butter and 1 tablespoon oil in a very large saute pan over medium heat. Add the soaked bread and cook for 2 to 3 minutes on each side, until nicely browned. Place the cooked French toast on a sheet pan and keep it warm in the oven. Fry the remaining soaked bread slices, adding butter and oil as needed, until it's all cooked.

Peel, core, Chop apples. Melt butter over medium heat. Add apples and cook until almost soft, about 6 minutes. Stir in sugar and cinnamon, and cook until combined and syrupy, about 2 minutes. Spoon over french toast and serve with creamy topping of your choice. Dust with powdered sugar, and enjoy!

Tuesday, December 9, 2008

Cocoa Agave Banana Oat Nut Bread


Classes are almost over!

I came home today, cold and excited to be in my warm kitchen with a few hours of free time before finals really hit. I'd planned on cleaning up the house today, and in the process of tidying the kitchen, I came across a plastic bag with three very ripe bananas. We're always scrounging dollar bags of just-past-perfect bananas, which are perfect for baking. Especially when they are sitting behind the fruit bowl in a twenty-somethings' kitchen for a week. Right.

So in the pursuit of cleaning, and making the house smell fabulous whilst I do so, I decided to try a new banana bread recipe. I know I've posted a similar recipe before, but this time I decided to use 100% whole wheat flour, replace all of the sugar with agave, and use olive oil - I'm telling you, this was one healthy loaf of bread. Normally when I cook with these ingredients, it's something I whip up when I want something for myself. I'll pull out all the stops - butter, sugar, chocolate, cream - for my friends and family, but there's something really rewarding about cooking with whole foods that my body really craves.

I used olive oil, agave, two fresh, organic eggs, unsweetened cocoa powder, whole wheat flour, oats, almonds, and bananas. Three whole bananas, in fact, which I think made it possible to use less sweetener. The prep for this bread took all of five minutes, and it popped in the oven for an hour while I did all my cleaning. Soon, the smell of toasted nuts met me as I swept the living room, and I crept back into the kitchen to check on the oven. It looked great, and the smell was fantastic, so I figured, even if it tasted "super healthy", it'd be a success. Boy, did I underestimate this little guy.

Sweet and moist with a hint of cocoa and toasted nut crunchiness, I wouldn't think twice before serving this to my friends. Or, maybe giving mini-loaves to my professors. It couldn't hurt!

Eat well, stay warm, and enjoy your week!

Cocoa Agave Banana Oat Nut Bread

1/2 cup agave nectar
1/3 cup olive oil
1 teaspoon vanilla extract
2 eggs
2 tablespoons unsweetened cocoa
3 very ripe bananas
2 cups whole wheat flour
1/2 cup whole oats
1/2 teaspoon salt
1 Teaspoon baking soda
1/2 cup chopped almonds, plus more for sprinkling on top

Preheat oven to 330
Sift together flour, baking soda, and salt. Mix in oats and set aside.
In a large bowl, beat oil and agave nectar. Add eggs one by one and mix well. Mix in bananas, cocoa and vanilla, making sure everything gets incorporated. Stir in flour/oat mixture and nuts. Grease a regular loaf pan, and pour batter in, spreading evenly.
Sprinkle with remaining chopped nuts.
Bake for 50-60 minutes, until an inserted toothpick comes out clean. Enjoy warm or wait a while for the flavors to blend.

Saturday, November 29, 2008

Happy Birthday Muffins!


Today is my roommate Dragonfruit's birthday, a perfect morning mid-way through a long weekend, when we realize we still have two days of relaxation ahead of us. Why not spend a few minutes making warm, filling breakfast muffins for one of my best friends, simply because she deserves it. Oh, and because I still have a giant box of local apples sitting in my living room. 

I'm pretty sure everyone in my life is tired of sugary, apple-y baked goods. I know apples will last forever, but I can't justify buying more fruit until I've used up the box. The solution? Whole-wheat and multigrain spice apple muffins, made with nonfat yogurt and sweetened with a bit of agave. They were perfect, the apples were sweeter for the lack of sugar, and the oat crumble topping was deliciously crisp with a touch of salt. 

I had originally wanted to grate the apples, and I would really recommend it if you have the time or desire - it would distribute the sweetness throughout the muffin. To save time, using my trusty apple-peeler-corer-slicer, I chopped the apples into a small dice - little gems of fruit in the finished muffins. 

I used an organic whole multi-grain hot cereal blend from Trader Joe's - with barley, rye, oats, and wheat - and organic blue agave nectar. Try these when you want something wholesome and hearty - perfect for a cloudy late fall (fine, winter) morning with good friends and tea. 

Organic Multigrain Apple Muffins with Agave

Batter:
1 1/2 cups 100% whole wheat flour
1 cups organic multi-grain hot cereal blend (or steel cut oats)
1 1/2 tsp cinnamon
1 tsp nutmeg
1 tsp ginger
1 tsp baking soda
1/2 tsp salt
1/2 cup canola oil or non-hydrogenated margarine, melted
1/3 cup organic agave nectar
2 large organic eggs
1/2 cup milk (cow, soy, or almond all would work)
1/2 cup plain yogurt (any kind - I used non-fat)
1 tsp vanilla
1 1/2 cups grated or diced apple pieces

Topping:
1 cup multigrain cereal or oats
2 tbsp agave nectar
1/2 tsp cinnamon
1/4 tsp salt
2 tbsp canola oil or melted margarine

Preheat oven to 325.

In a large bowl, whisk together grains, flour, baking soda, salt, and spices. Stir in apple pieces. In a standing mixer or in a large bowl with a whisk combine the oil, agave, eggs, yogurt, milk, and vanilla. Fold in the dry ingredients until just combined. Mix together topping. Pour into muffin tins and sprinkle with topping.
Bake for about 25 minutes or until golden brown - these are best after they've had a chance to cool in the pan, as the flavors combine and they are much easier to remove. Enjoy!

Saturday, September 6, 2008

Penny Pinching with Roasted Vegetable Bread Soup


Its another one of those weeks. I'm scrounging around the kitchen trying to feed myself for a few more days on the random odds and ends of the kitchen. What with school starting, buying textbooks, some auto mishaps that needed immediate attention, and rent, I'm pulling out the old bag of tricks to stretch my food budget.

Somehow, this always comes back to a loaf of stale bread. It might just be coincidence, but it seems every time I go through one of these "Let's see how long I can go without heading to the store" moods, I'm left staring at a loaf of bread on the shelf, long past it's fresh sandwich slice days. I don't eat a lot of bread, and everyone in the house buys their own (we're pretty independent eaters in general), so there is inevitably a loaf of bread past its prime in the cupboard at any given moment.

Last time I had this problem, I made a delicious panzanella, but I've been living off salads recently and wanted something a bit more filling. I've picked up this habit of making a roast chicken every Sunday night, and using it throughout the week, from curries to chicken salad to sandwiches, and I had a really great broth from last week's bird. Why not make a soup? At first I was going to just make some croutons out of the bread to put on top of a bowl of soup (french-onion style) but then I thought, why not make a bread soup?

This probably is not the traditional way to make a bread soup, because I added the bread cubes at the beginning and not at the very end, but this gave the soup a thick, satisfying texture. The bread acted like a sponge and soaked up all the herbs and broth - so the end result tasted like a combination of thanksgiving stuffing and chicken noodle soup.

I had a few vegetable odds and ends lying around the kitchen, so I roughly chopped what I had (a bell pepper, a summer squash, whole garlic cloves, and some grape tomatoes which I left whole) and threw them under the broiler for about 6 minutes to get a bit toasty.


While the veggies cooked, I sauteed an onion and a diced hot cherry pepper from my garden in some olive oil. When the onions were just beginning to brown, I added two cups of chicken stock, a teaspoon each of sage, thyme, oregano, rosemary, and parsley, and a good amount of salt. I cut up about 7 slices of bread (mine was whole wheat sourdough but this would be good with most breads, I'm sure) into cubes and threw them in to the soup, brought this to a boil, and reduced to a simmer. When the veggies were browned and fragrant, I tossed them into the pot (I mashed and chopped the roasted garlic before adding it - yum!), added two cups of water, and let the whole thing simmer for about 2 hours while I went to the farmers market.

When lunchtime rolled around, I ladled a big bowl of the soup and topped it with freshly chopped basil, tomatoes, and pine nuts. So comforting, and I'm sure it would adapt to any veggies you have lying around.

Satisfied with my week of frugality - down to the last slices of bread - I took a precious $20 to the market this morning to replenish the kitchen. I met up with some of my band mates and we sang a few songs (I pocketed five bucks for three songs - not bad!) and went off to stretch my dollars. I'm so excited about how much I got! There was a great deal at one vendor - three boxes of any fruit for 8 bucks! I walked away with 5 pears, 4 big peaches, and 6 nectarines, which will certainly last me a while. I also got some beautiful cylinder beets, a bag of apples, a huge bunch of basil, a cantaloupe, a big zucchini, a baking potato, and a bag of bee pollen (nature's superfood!) - plus it was a beautiful morning to be at the market - the skies were gray but the air was fresh and not too cold.


I'll let you know what I do with my market bounty - until then, eat well!

Thursday, August 7, 2008

By Request: Whole-wheat Lemonbasil Bread


A few weeks ago, Angie from Three Sisters Organic Farm and Are We There Yet? asked me if I had a recipe for lemon basil bread that I could share. At the time I didn't, but I've been known to rise to the occasion for a food request (ah, that angel food "castle cake" - tip: don't try to frost an angel food cake. Really, try to avoid it. Especially at midnight the night before a nine year old's birthday party).

Part of my insistence on following through with Bread Tuesday on one of the hottest days of the year was experimenting with a bread recipe for Angie, adapted from the amazing Beth Hensperger's Bread Bible. I only have one cookbook dedicated exclusively to bread baking, but, at this point, it has served me well enough to keep it that way. I used her recipe for Basil Bread, and substituted lemon basil and pine nuts (which are optional, but give a great buttery nut crunch), as well as a good amount of lemon zest. The result was a hearty, flavorful, savory bread... so good... hey, will you wait a second while I go grab some right now? Thanks.

...

Ok, I'm back. (note: this bread really wants to be toasted and dressed in salted butter. I only have unsalted at the moment, and the first bite was a bit uninspiring. Sprinkled a bit of sea salt and WHAM, there's the lemon basil flavor and pine nutty goodness. So salt it, friends.)


Aw, a dough heart.

This dough requires a bit of kneading, and mine was on the sticky side. One of these days I'm going to have to cowboy up and buy a stand mixer. The amount of time I spend whisking and kneading everything by hand really adds up. Anybody have an old one you're not using? I'll be happy to take it off your hands.

Enjoy this bread, it would go really well with a tomato based pasta sauce - basil, tomato, and pine nuts... a holy trinity indeed.

Eat well, and stay cool!


Whole-Wheat Lemon Basil Bread
Adapted from Beth Hensperger's The Bread Bible

Makes two 9-by-5 loaves

1/2 cup warm water (105° to 115°F)
1 tablespoon (1 package) active dry yeast
Pinch of sugar

1 cup warm buttermilk (105° to 115°F)
1 cup warm water (105°to 115°F)
1/4 cup honey
4 tablespoons unsalted butter, melted
5 to 5-1/2 cups whole-wheat flour
1/2 cup minced fresh lemon basiI
1/2 cup pine nuts, chopped
2 tablespoons lemon zest
2-1/2 teaspoons salt

2 tablespoons olive oil
1 teaspoon sea salt
1 tablespoon dried basil

1. Pour the warm water in a small bowl. Sprinkle the yeast and sugar over the surface of the water. Stir to dissolve and let stand at room temperature until foamy, about 10 minutes.
2. In a large bowl using a whisk, combine the buttermilk and water. Stir in the honey and melted butter. Place 2 cups flour, the basil, zest, nuts, and salt in a large bowl. Add the milk and the yeast mixtures and beat until smooth, about 3 minutes. Add the flour, 1/2 cup at a time, with a wooden spoon until a soft dough that just clears the sides of the bowl is formed.
3. Turn the dough out onto a lightly floured work surface and knead until soft, slightly sticky, and very pliable, about 5 minutes, dusting with the flour only 1 tablespoon at a time as needed.
4. Put the dough in a greased deep bowl. Turn the dough once to grease the top and cover with plastic wrap. Let rise at room temperature until doubled in bulk, 1 to 1-1/2 hours. Don't let this dough rise more than double in volume. Gently deflate the dough and let it rise again, if you have time. It will take only half the time to rise the second time.
5. Gently deflate the dough. Turn the dough out onto a lightly floured work surface. Grease two 9-by-5-inch loaf pans. Divide the dough into 2 equal portions. Shape each portion into a loaf and put in the pans. Cover loosely with plastic wrap and let rise again until doubled in bulk, about 30 minutes.
6. Brush the loaves with the olive oil and sprinkle them with salt and dried basil.
7. Twenty minutes before baking preheat the oven to 350°F. Place the pans on the rack in the center of the oven and bake 50 to 60 minutes, or until the loaves are brown and sound hollow when tapped with your finger. Transfer the loaves immediately to a cooling rack. Cool completely before slicing.

Tuesday, August 5, 2008

A Family Affair on Bread Tuesday


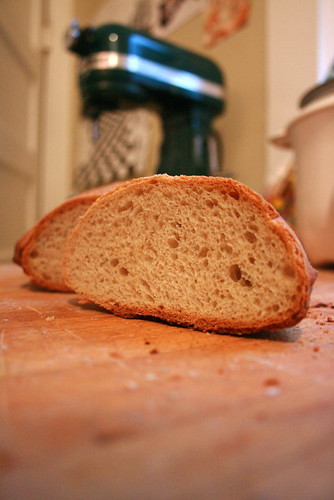
I woke up early this morning and declared it 
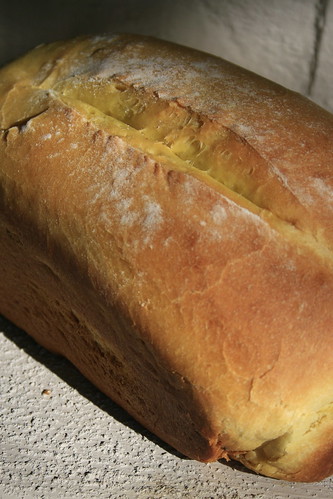
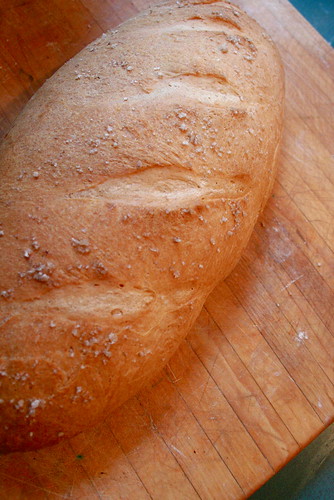
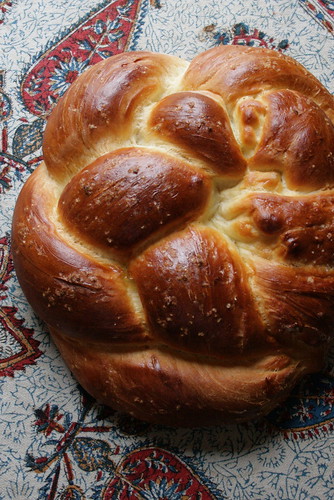
Bread Tuesday. I thought I'd better get to work using up the HUNDRED pounds of flour I bought this week, and set aside a few hours to make a lot of whole wheat bread - some to eat, some to freeze for later, some to bribe my loved ones with...

After a lovely morning of crossword puzzles, eggs benedict, and a whirlwind of spontaneous laundry sorting, I tied on my apron, turned on the radio, and got to work. Only one problem - the kitchen was a disaster zone. I live with my best friends, and none of us are especially messy individuals, but with the combined kitchen clutter output of my thrice daily cooking adventures and the sheer volume of kitchen usage between the five of us - it's bound to get pretty hectic. Oh, and how.

Luckily, I had my productive pants on and I happily got to work scrubbing, rinsing, drying, organizing, and sweeping up the accumulated kitchen lives of five twenty-somethings. I don't know when I became one of those people that loves doing dishes, but surely enough, I geek out over steel wool and soap bubbles. I was just about to settle into scraping the gunk from around the electric stove burners, when I realized I was having too much fun and it was time to get to work. Leaving the less-than-perfect stove top, I pulled out the big canister of whole wheat flour from the cupboard, snatched the yeast from the freezer, and was just about the heat some water to between 105 and 115 degrees, when I noticed something looking at me.

There, on the counter next to the garlic, were five brown, spotty bananas. My roommate Dragonfruit has this habit of buying weekly dollar bags of dozens of bananas from Limbo, and uses them as her primary source of nutrition until they run out. The promise of making banana bread with the mushiest of them floats in and out of actualization, but most of the time they disappear one by one as D gets hungry, their sad, brown peels lying in the compost next to the beet greens. Setting my yeast back in the freezer for a few more hours, I decide to make the dream a reality - it was Bread Tuesday after all - and banana bread there would be.

Here's where the family bit comes in. Growing up, my family used cookbooks even less than I do now - we had a series of truly reliable dishes in a relatively constant rotation, and if it was anything other than baked chicken thighs or spaghetti, my parents didn't need a recipe to whip up something new. The Joy of Cooking came out once in a while for cookies or cakes, but for the most part, we got along fine without help. Because of this, the few cookbooks we owned sat in the dining room closet dubbed the Liquor Cabinet - a full-sized shelved closet filled with homeopathic remedies, a bunch of random serving platters, the ice bucket for parties, and the same twelve bottles of liquor we only used when my grandparents came over. On the highest shelf of this random collection sat the cookbooks, lined up and gathering dust - save for the previously mentioned Joy and one other: My First Cookbook by Rena Coyle.

This was officially my older sister Casey's cookbook, and we would use it for after school snacks and the occasional breakfast in bed we'd make for our parents birthdays, anniversaries, sick days and such. Casey still waxes poetic about a certain recipe we made, spending an entire afternoon assembling a fancy chicken dinner of chicken thighs, canned cream soup, frozen mixed vegetables, and tubed biscuit dough (the tops of the biscuits would get all brown and the bottoms would stay gooey and doughy - which was a delight, believe it or not).

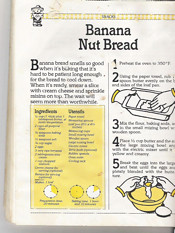
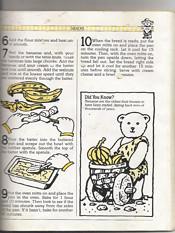
I'm pretty sure the only reason we even talk this book anymore is a certain Banana Nut Bread recipe. A few years ago, Casey wanted to make something special for her then-boyfriend, and remembered the famously moist banana bread recipe from the "teddy bear" cookbook, still at our parents' house on the top shelf. She called up Mom and Dad and asked them for the recipe, and the perfect banana bread was born again in New York. I emailed Casey this morning and asked her to send me the recipe, thinking she'd just send back a few paragraphs of text, but nope - I opened my email and found scanned images of the two pages from the original book, teddy bear illustrations and all.

She's not seeing that guy anymore, but you bet your buttons those scanned pages are still with here everywhere - literally - she's still got them on her iPod Touch. We'd made a batch a few weeks ago when I was down in California, and I thought I'd play with the recipe using a few of D's spotty bananas, lest they keep staring and distracting me from making the most of Bread Tuesday.

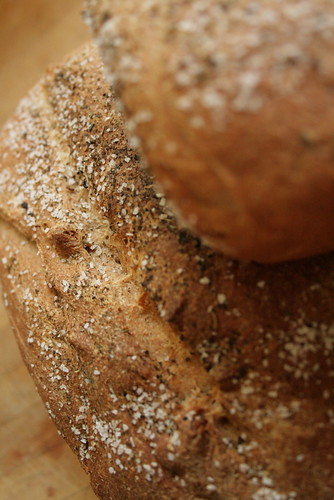
As I'm mixing up the bread - which gets its amazing tenderness from sour cream - I get two emails from Casey and my mom, simultaneously. Casey's says,
"Subject: my first cookbook
its called my first cookbook by rena coyle. mom says the page is covered in flour, banana and dough"
and Mom's reads,
"Subject: I just smelled the bear recipe of banana bread...
It does smell, even tastes like banana bread. Bob tasted some of the crumbs of dough on the page. Will be looking for the blog about it."

This is my family. Spread across the country, but united by the internet and a recipe. Three separate kitchens, in three corners of the nation, will smell like banana bread today. You should join us, and have a fantastic Bread Tuesday.

Eat Well.


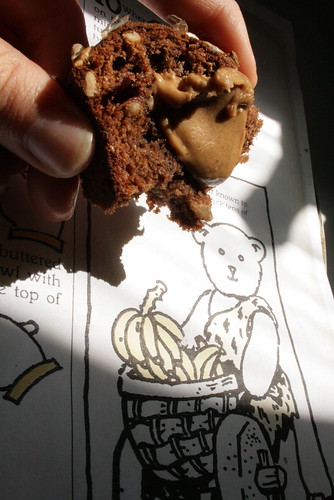
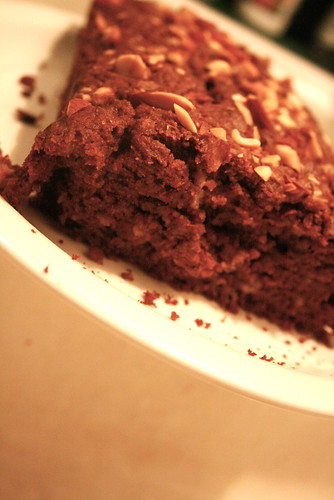
It doesn't surprise me that my dad tasted dough that has been 
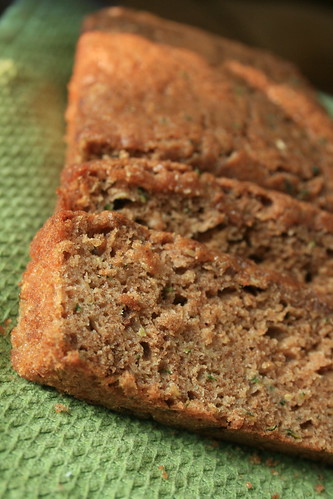
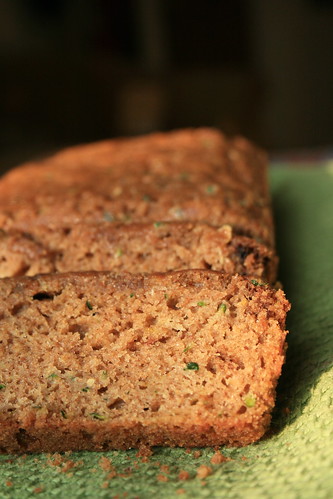
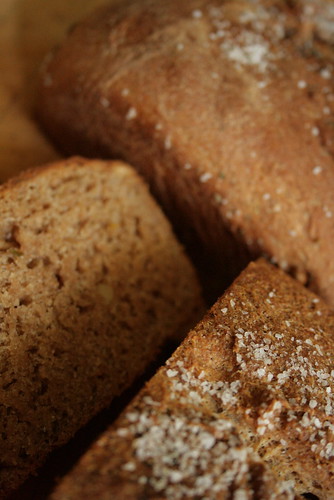
smooshed between the pages of a children's cookbook for what must have been years, but you will be surprised by how good this banana bread is. As much as this story is about the original Banana Nut Bread, I just had to tweak it a bit. I'm me, 
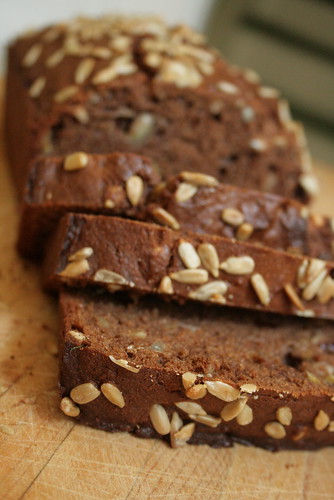
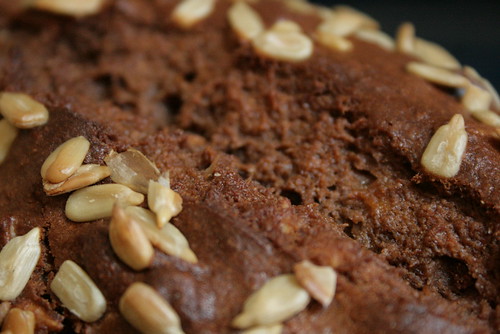
afterall. I used 100% whole wheat flour, a bit of cocoa, some dried cranberries, and replaced the walnuts with sunflower seeds. Here's the recipe for my version of the Perfect Banana Bread.

Seedy Cocoa-Cranberry Banana Bread
adapted from Rena Coyle's My First Cookbook, 1985

1/2 cup butter plus 1 Tbs for greasing pan
2 cups whole wheat flour
3 Tbs unsweetened cocoa
3/4 tsp baking soda
1/2 tsp salt
3/4 cup sugar
2 eggs
3 very ripe bananas
2 Tbs sour cream
1/2 cup dried cranberries
1/2 cup raw, shelled sunflower seeds

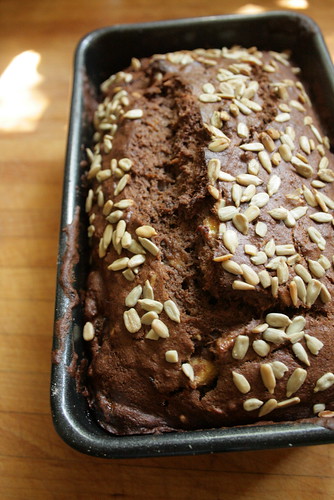
Preheat oven to 350. Grease a loaf pan with butter. Mix flour, cocoa, baking soda, and salt in a small bowl. Cream together butter and sugar with hand mixer until creamy. Add eggs and beat until incorporated. Add cocoa/flour mixture and beat until smooth. USING YOUR HANDS, mush bananas into batter, leaving some large chunks. Add sour cream, seeds, and cranberries and mix until evenly distributed. Pour batter into loaf pan, scraping bowl with a rubber spatula. Bake for one hour and 10 minutes, or until the bread pulls away from the sides of the pan. Let cool, slice, and enjoy with family.

Save a few crumbs for future memories.