Sunday, December 21, 2008

Snowed In, Day 2: Sweet Potato Cinnamon Rolls


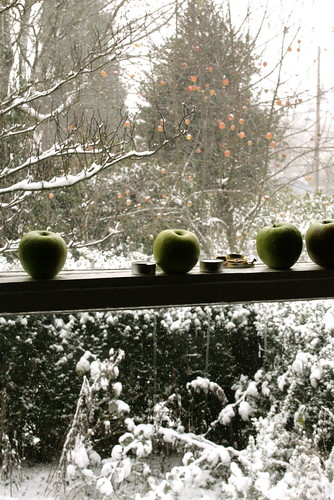
We got another few inches of snow overnight, and we woke up to freezing rain, which made a thick crust of ice over the fluffy snow. Reeeeally fun to walk in, even more fun to sled in, but not very fun to drive in, or, as it turns out, to fly in either.

A mess of flights out of PDX were cancelled or delayed today. Difficult for travelers, good business for airport stores and restaurants! When we think airport delays, I'd bet a lot of us think about distracting ourselves with a sweet, icing-slathered roll of dough - yes, the Cinnabon. I don't think we have a Cinnabon franchise at PDX, but I think the urge exists nonetheless.

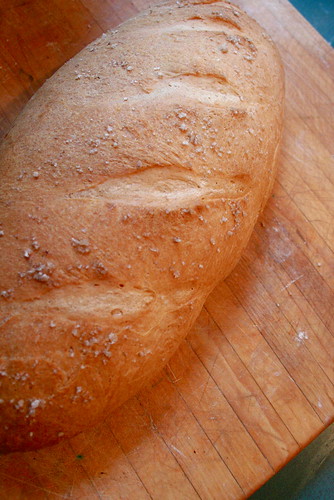
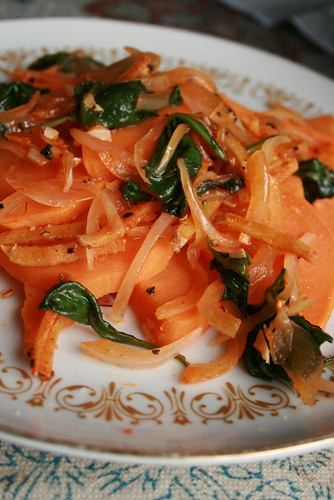
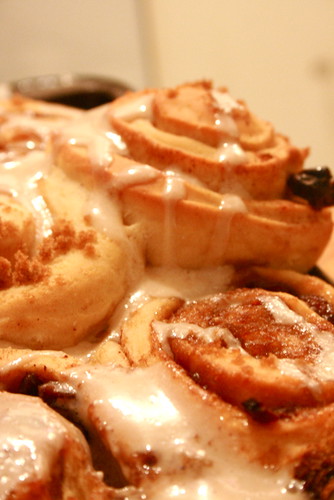
In honor of my friends and neighbors stranded in our newly-frosted city, I thought I'd create a cinnamon roll using Oregon produce. This time of year, that means one of a few things: winter greens, apples, and root vegetables. While a kale sweet roll would be, well, an experiment, I think sweet potatoes lend themselves a bit more to a tribute dessert.


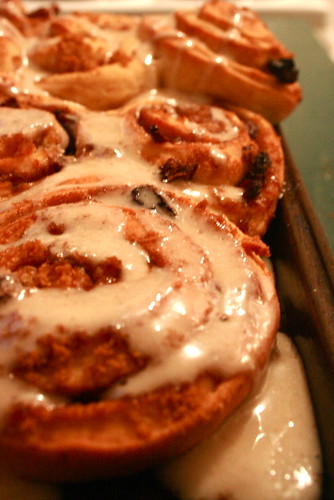
My roommates Weasel and Greenbriar had a fantastic time sledding down our street, and were more than delighted to be met with a smell of cinnamon sugar and pecans as they peeled off their gloves, scarves, and snow clothes.

After the first bite, Weasel squealed, "You made these... from scratch?" Yes, darlin', it's not like I've got anything else to do. Sooner or later, cabin fever will set in, but until then, we'll be eating well.

Travel safe!

Sweet Potato Cinnamon Rolls with Maple Cream Cheese Glaze
adapted from Beth Hensperger's Bread Bible

Dough
1 medium sweet potato (about 6 ounces), peeled and cut into large chunks
2 tablespoons unsalted butter
1 tablespoon active dry yeast
1/2 cup (packed) brown sugar
1/4 cup warm water
2 tablespoons vegetable oil
1 large egg, room temperature
1 teaspoon salt
5 cups unbleached all-purpose flour

Filling
4 tablespoons unsalted butter, melted
1 1/4 cups (packed) light brown sugar
1 1/2 tablespoons cinnamon
1 cup raisins, plumped in hot water and drained
1 cup chopped pecans

Glaze
1 1/2 cups powdered sugar
5 tablespoons milk
2 tablespoons real maple syrup
1/4 cup cream cheese, softened
1/4 teaspoon salt

In a medium saucepan, combine the sweet potato chunks with water to cover. Bring to a boil, reduce heat to low, and cook uncovered about 20 minutes. Drain the sweet potato, reserving 1 cup of the liquid. let the potato water cool to warm. Meanwhile, process the sweet potato with the butter in a food mill placed over a large bowl, or purée in a food processor until smooth.
Pour the warm water (not the potato water - the other 1/4 cup) in a small bowl. Sprinkle the yeast and a pinch of the brown sugar over the surface of the water. Stir to dissolve and let stand at room temperature until foamy, about 10 minutes.
In a large mixing bowl with a whisk or in the work bowl of a stand mixer fitted with paddle attachment, combine the pureed sweet potato, the potato water, yeast mixture, the remaining brown sugar, oil, egg, salt, and 2 cups of flour. Beat hard to combine, about 1 minute. Add the remaining flour, 1/2 cup at a time, until a shaggy dough that just clears the side of the bowl is formed.
Turn the dough out onto a lightly floured work surface and knead until smooth and springy, about 4 minutes, dusting with flour only 1 tablespoon at a time as needed to prevent sticking. If kneading by machine, switch from paddle to dough hook and knead for 3 to 4 minutes, or until the dough is smooth and springy and springs back when pressed. If desired, transfer the dough to a floured surface and knead briefly by hand.
Place the dough in a greased deep container. Turn once to coat the top and cover with plastic wrap. Let rise in a warm place until doubled in bulk, 1 to 1 1/2 hours. Gently deflate the dough and let rise a second time until doubled in bulk, 50 minutes to an hour.
Gently deflate the dough. Turn the dough out onto a lightly floured work surface. Divide the dough into two equal portions. Roll out each portion into a 10-by-14 inch rectangle, at least 1/4 inch thick. Brush the surface of each rectangle with the melted butter. Sprinkle the surface of each rectangle evenly with half of the brown sugar, cinnamon, raisins, and pecans, leaving about 1 each around the borders. Starting from the 10 inch end, roll the dough up and pinch seams together. Using a sharp knife, cut each roll into 1 inch slices. Place each slice on baking sheet, at least two inches apart. Cover loosely with with plastic wrap and let rise at room temperature just until puffy, about 20 minutes.
Twenty minutes before baking, preheat the oven to 350 degrees. Place the baking sheet on a rack in the center of the oven and bake 30 minutes, or until golden brown and firm to the touch. Prepare glaze by combining the powdered sugar with milk, syrup, cream cheese, and salt, whisking until smooth. Drizzle mixture over over rolls, and let stand until warm. Enjoy!

Saturday, December 20, 2008

Acorn Squash, Two Ways


We had a brief respite from the "arctic onslaught" yesterday, and I was able to zip around and get some errands done, enjoying the sun (!) around Portland. But, much to my delight, I woke up this morning to white flurries riding the wind outside my bedroom window - and a few inches on the ground. I'm so in love with snow, that I really don't mind that Portland ceases to function under these conditions. It means more time to read, more time to finish holiday presents, and more time to cook!

This morning's Farmers' Market would have been all about winter squash - the sturdy champion of these wintry days and nights - and I'm pretty sad I didn't get a chance to thank all of my favorite farmers for a great year. I thought I'd commemorate the end of market season by roasting a sweet little acorn squash, and proving that these guys are a food of many hats by doing a savory and sweet rendition for each half.

For the savory side, I crafted an open-faced sandwich using fresh Tuscan Peasant Bread that I made this morning. If you couldn't tell, I'm having the time of my life baking every day. I'm usually running around Portland, hopping from one task to another, that the though of making bread seems like an indulgence I don't have the time for, seeing as I'm rarely in the house for a few consecutive hours. But this week, what with this lovely winter weather that has shut down the city, I've got all the time in the world - what's a two hour rising time when I'm snowed in for the whole day?


Plus, I was able to roast my squash in the oven while the bread was baking. Hooray for multitasking. I didn't do anything fancy with the acorn squash - just cut it in have, scooped out the pulp, and dotted each with a pat of butter and some kosher salt. I nestled the halves into a shallow pie pan filled with about a half inch of water. The bread was baking for an hour at 425 degrees, so I left the squash in for the same amount of time. It's kind of hard to screw up winter squash.


I used Beth Hensperger's Tuscan Peasant Loaf recipe from (where else?) the Bread Bible, though I like to add a touch more salt and replace the sugar with honey. This bread has a great crust and a dense crumb - perfect for sandwiches! I took two big slices of the bread, brushed on a bit of olive oil and rubbed the slices with garlic. I layered on roasted zucchini, slices of one half of the acorn squash, and some slices of really good local havarti from Willamette Valley Cheese Company - my absolute favorite cheese - and popped it under the broiler for a minute, until the cheese was golden and the bread was toasty.

I mixed up some halved kalamata olives, capers, and balsamic vinegar to drizzle over the top. Yum. The zucchini, squash, and cheese melted together to a really creamy consistency, perfectly set off by the crunchy bread. This was SO filling, I had to put a half back in the fridge for later. I'm sure it will be just as good in a few hours.


For the sweet side, I called upon my mom's old trick to get us to eat banana squash - her's and everyone else's moms' - by sprinkling the other half with brown sugar and cinnamon. Nothing to it - creamy, sweet, a little salty, and a perfect accompaniment to the open-face sandwiches. No one could complain that it was the same ingredient twice - and it's a treat that would get anyone through a winter of squash!


Eat Well!

Friday, December 19, 2008

Challah French Toast with Sauteed Apples


Ah, winter bliss. Finals are over, and I'm snowed in with plenty of time to bake in a warm kitchen. Honestly, I don't know how these few days of vacation could get any better. Oh wait, yes I do - Challah! I adore making challah. There's something so satisfying about putting together a few simple ingredients and making something that tastes just right every time. It's such a familiar taste, sweet, eggy, fluffy bread - with a bit of honey it tastes like every great challah I've ever had.


With the snow falling outside, I'm just about falling apart with happiness. Portland is really beautiful in the snow, though I have to admit I haven't seen much of it. I have this fear of being in vehicles in the snow, so I've been stuck within a mile's radius of my house since last weekend. Luckily, everything I need is within walking distance, and it's really fun to get all bundled up to walk like a penguin to the coffee shop for hot chocolate while my bread rises.

I used my no-fail challah recipe from Beth Hensperger's Bread Bible. EVERYONE who wants to dabble in home bread baking needs this book, and since I didn't change the recipe at all, I'll encourage you to go find your own copy. Hint - it's also on google books.

Plus, when you make challah, that means you get to make challah french toast! I'm STILL working my way through a big box of apples (yes, the same apples from the great Thanksgiving Pie Event). Winter fruits and vegetables are miracles, honestly. Anyway, I thought I'd make a sauteed apple syrup for my french toast, and it turned out so well, especially with a bit of creamy yogurt. I'll make it through this winter, farmers market or not. If every morning could be like this morning, I don't think I'd have any problems at all.


Stay warm, drive safely and eat well!

Here's the recipe for my challah french toast. Perfect thing for a lazy, snowy morning.

Challah French Toast with Sauteed Apples

Ingredients
5 eggs
1 cup half-and-half or milk
1/2 teaspoon pure vanilla extract
1 large loaf challah
Unsalted butter
Vegetable oil

For topping:
4 large apples
1/2 cup sugar
1 teaspoon cinnamon
2 tablespoons butter

Optional: greek yogurt, whipped cream, Crème fraîche, or vanilla ice cream, if you dare.

Directions
Preheat the oven to 250 degrees F.

In a large bowl, whisk together the eggs, half-and-half, and vanilla. Pour mixture into shallow container, like a pie pan or deep plate. Slice the challah into thick slices, and soak slices in the egg mixture for 5 minutes, turning once.

Heat 1 tablespoon butter and 1 tablespoon oil in a very large saute pan over medium heat. Add the soaked bread and cook for 2 to 3 minutes on each side, until nicely browned. Place the cooked French toast on a sheet pan and keep it warm in the oven. Fry the remaining soaked bread slices, adding butter and oil as needed, until it's all cooked.

Peel, core, Chop apples. Melt butter over medium heat. Add apples and cook until almost soft, about 6 minutes. Stir in sugar and cinnamon, and cook until combined and syrupy, about 2 minutes. Spoon over french toast and serve with creamy topping of your choice. Dust with powdered sugar, and enjoy!

Last Portland Farmers' Market CANCELLED

I've got some sad news to report to my Portland readers. My friends at Portland Farmers' Market just informed me that this Saturday's Solstice market - the last scheduled market of the year - has been cancelled due to this wintry weather.


Frozen, snow covered fields and transit roads have made it difficult, if not impossible for the farmers to harvest and deliver crops for this weekend's market. The forecast indicates more ice and snow is on the way this weekend. In the interest of vendor and shopper safety, market staff have regretfully decided to cancel the last market.

It's been such a great market year - the kids cook classes, the great music, saying hello to new vendors and staff and saying goodbye and thank you to old friends. I'd like to thank everyone at PFM for allowing me to help out, even if my hands are still burning from shucking all of that corn straight off the grill. You guys are my heroes, and you know I'll show up bright and early to document the opening day of our 19th year.


My sad backyard garden, and my happy, oddly orange, kitchen.

Please join me on March 21, 2009 to welcome a new year of harvest, friends, and fun. Until then, we'll have to get our root vegetable, squash, and bean fix at some of our fantastic local grocers.

Help me spread the news about this weekend - I wouldn't want a bunch of hungry people showing up to an empty lot of ice and snow.

Happy Holidays, and keep eating well!

Wednesday, December 10, 2008

Cauliflower-Garlic "Mashed Potatoes"


This weekend is going to be a cold one in Bridgetown! Stay warm, wherever you are, and find comfort in the reliability of winter veggies - warm squash, roots, tubers, and the noble, sturdy cauliflower!

Here's a fun recipe for this seasonal staple. I picked up a few big beauties at the farmer's market this week, and thought I'd try an old favorite - mock mashed "potatoes". I like this recipe because it uses the whole vegetable - cauliflower leaves and all. I always feel funny not using large parts of my fruits and vegetables, even if I try to make broth with them, but the fabulous Lynne Rossetto Kasper solves that problem by steaming the leaves right along with the cauliflower. Because of this, the end product doesn't look much like mashed potatoes - the greenish tint ruins that illusion - but the texture is really satisfying when you want a big bowl of mash, guilt free, and the leaves add extra fiber.

If you don't use cauliflower often, you should really consider adding it to your repertoire. It's inexpensive, filling, and takes on a fantastic creaminess when cooked. I also like to toss cauliflower florets with olive oil, salt, and cumin, and broil until browned and a bit crispy. Perfect for a quick snack or a simple side dish, this wins over critics every time. Experiment with different seasonings - cauliflower goes really well with a variety of flavors. Here, it pairs well with nutmeg - and plenty of garlic.

Cauliflower-Garlic "Mashed Potatoes"
© 2005 Lynne Rossetto Kasper

Serves 16 to 18 as part of a large menu

2 large heads cauliflower (preferably organic)
10 large cloves garlic, thinly sliced
Salt
2 tablespoons good-tasting butter
6 tablespoons good-tasting extra-virgin olive oil
¼ teaspoon freshly ground nutmeg
Freshly ground black pepper to taste

1. Cook in two batches. Set a collapsible steamer basket in a 6-quart pot. Add water to come just above the bottom of the steamer. Cover and bring to a boil. Meanwhile, wash cauliflower and its leaves. Cut leaves into thin slices. Break cauliflower into flowerettes.

2. Drop leaves onto the steamer and sprinkle lightly with salt. Add half the cauliflower, all the garlic, then remaining cauliflower. Sprinkle lightly with more salt. Cover and steam over medium-high heat 8 minutes, or until cauliflower is so tender a knife just slips into it.

3. Drain in a colander, turn into a food processor fitted with the steel knife, and add butter and oil. Puree until smooth. Season to taste with pepper, nutmeg, and more salt if needed. Serve immediately, or refrigerate, covered, and reheat later.

Tuesday, December 9, 2008

Cocoa Agave Banana Oat Nut Bread


Classes are almost over!

I came home today, cold and excited to be in my warm kitchen with a few hours of free time before finals really hit. I'd planned on cleaning up the house today, and in the process of tidying the kitchen, I came across a plastic bag with three very ripe bananas. We're always scrounging dollar bags of just-past-perfect bananas, which are perfect for baking. Especially when they are sitting behind the fruit bowl in a twenty-somethings' kitchen for a week. Right.

So in the pursuit of cleaning, and making the house smell fabulous whilst I do so, I decided to try a new banana bread recipe. I know I've posted a similar recipe before, but this time I decided to use 100% whole wheat flour, replace all of the sugar with agave, and use olive oil - I'm telling you, this was one healthy loaf of bread. Normally when I cook with these ingredients, it's something I whip up when I want something for myself. I'll pull out all the stops - butter, sugar, chocolate, cream - for my friends and family, but there's something really rewarding about cooking with whole foods that my body really craves.

I used olive oil, agave, two fresh, organic eggs, unsweetened cocoa powder, whole wheat flour, oats, almonds, and bananas. Three whole bananas, in fact, which I think made it possible to use less sweetener. The prep for this bread took all of five minutes, and it popped in the oven for an hour while I did all my cleaning. Soon, the smell of toasted nuts met me as I swept the living room, and I crept back into the kitchen to check on the oven. It looked great, and the smell was fantastic, so I figured, even if it tasted "super healthy", it'd be a success. Boy, did I underestimate this little guy.

Sweet and moist with a hint of cocoa and toasted nut crunchiness, I wouldn't think twice before serving this to my friends. Or, maybe giving mini-loaves to my professors. It couldn't hurt!

Eat well, stay warm, and enjoy your week!

Cocoa Agave Banana Oat Nut Bread

1/2 cup agave nectar
1/3 cup olive oil
1 teaspoon vanilla extract
2 eggs
2 tablespoons unsweetened cocoa
3 very ripe bananas
2 cups whole wheat flour
1/2 cup whole oats
1/2 teaspoon salt
1 Teaspoon baking soda
1/2 cup chopped almonds, plus more for sprinkling on top

Preheat oven to 330
Sift together flour, baking soda, and salt. Mix in oats and set aside.
In a large bowl, beat oil and agave nectar. Add eggs one by one and mix well. Mix in bananas, cocoa and vanilla, making sure everything gets incorporated. Stir in flour/oat mixture and nuts. Grease a regular loaf pan, and pour batter in, spreading evenly.
Sprinkle with remaining chopped nuts.
Bake for 50-60 minutes, until an inserted toothpick comes out clean. Enjoy warm or wait a while for the flavors to blend.

Monday, December 1, 2008

Sweet Potato Ginger-Stick Curry


Leave it to Lynne Rossetto Kasper to figure out what my stir-fries have been missing. I've been cooking my way through The Splendid Table's new cookbook, How to Eat Supper, and there has been no shortage of epiphanies and inspiration. I'm always looking for more things to do with sweet potatoes (she calls them yams) because I find myself buying more every time I go to the store. They are just so comforting, healthy, and they last forever. Sweet potato fries are a regular event at my house, but they never seem to fully explore the potential of the ingredient.

In this recipe, the fantastic Lynne treats the humble sweet potato the way it should be treated - with tons of flavor and complexity. Don't get me wrong, I find myself dreaming of a simple baked potato with butter and brown sugar a bit more than I'd like to admit, but all too often the tuber is tossed to the side. Here, it's the star.


She calls it a curry, which I suppose it might be and I'm just not up on the full range of uses of the word, but the strongest flavors are ginger, jalepeño, basil, and lime. Yum. The key here is the ginger - the recipe calls for ginger "peeled and sliced into paper-thin matchsticks". Luckily, I have a good knife, but I see how it might be a challenge.

Lynne says:
Cutting the ginger into paper-thin matchsticks may seem fussy, but there is method to what seems to be madness. That shape changes how you taste the ginger in this dish. Crushed or chopped ginger would taste different - an interesting thing to remember when you see very specific instructions like these in Chinese recipes. There's always a reason.
I made this dish twice, once as a simple stir fry and another to make lettuce wraps, where I pared it with fresh sliced cucumber, cashews, and yogurt in fresh butter lettuce leaves. Sadly, the book is due back to the library today, and the hold list is miles long, so I can't renew. My birthday's tomorrow, maybe I'll get my own copy. Hint hint.


Eat well!
Sweet Yams in Ginger-Stick Curry

Yams
4 quarts salted water
2 large Garnet or Jewel yams (about 1 3/4 pounds), peeled, halved lengthwise, and cut into 1/4-inch-thick half-rounds.

Curry
Extra Virgin Olive Oil
One 1 inch piece fresh ginger, peeled and sliced into paper-thin matchsticks
4 large garlic cloves, sliced paper thin
1 jalepeño, sliced very thin
2 whole scallions, cut into 1-inch lengths
2 large shallots, sliced thin
Salt and Pepper
1/2 light-packed cup fresh basil leaves, course chopped
Juice of 1 lime

1. Bring water to boil.
2. Once water is bubbling fiercely, drop in the yams and cook them at a hard bubble for 10 minutes, or until tender. Drain in a colander and turn into a serving dish. Set the pot back on the stove.
3. Generously film the pot with oil. Set it over medium-high heat and add the ginger, garlic, jalepeño, scallions, shallots, and generous sprinklings of salt and pepper. Saute for two minutes, stirring often. Then cover the pot tightly, reduce the heat to medium low, and cook for 5-8 minutes, or until the ginger has softened.
4. Stir in the basil and cook, uncovered, for no more than 30 seconds. Spoon curry over yams, and squeeze lime juice over the finished dish.