Sunday, December 21, 2008

Snowed In, Day 2: Sweet Potato Cinnamon Rolls


We got another few inches of snow overnight, and we woke up to freezing rain, which made a thick crust of ice over the fluffy snow. Reeeeally fun to walk in, even more fun to sled in, but not very fun to drive in, or, as it turns out, to fly in either.

A mess of flights out of PDX were cancelled or delayed today. Difficult for travelers, good business for airport stores and restaurants! When we think airport delays, I'd bet a lot of us think about distracting ourselves with a sweet, icing-slathered roll of dough - yes, the Cinnabon. I don't think we have a Cinnabon franchise at PDX, but I think the urge exists nonetheless.

In honor of my friends and neighbors stranded in our newly-frosted city, I thought I'd create a cinnamon roll using Oregon produce. This time of year, that means one of a few things: winter greens, apples, and root vegetables. While a kale sweet roll would be, well, an experiment, I think sweet potatoes lend themselves a bit more to a tribute dessert.



My roommates Weasel and Greenbriar had a fantastic time sledding down our street, and were more than delighted to be met with a smell of cinnamon sugar and pecans as they peeled off their gloves, scarves, and snow clothes.

After the first bite, Weasel squealed, "You made these... from scratch?" Yes, darlin', it's not like I've got anything else to do. Sooner or later, cabin fever will set in, but until then, we'll be eating well.

Travel safe!

Sweet Potato Cinnamon Rolls with Maple Cream Cheese Glaze
adapted from Beth Hensperger's Bread Bible

Dough
1 medium sweet potato (about 6 ounces), peeled and cut into large chunks
2 tablespoons unsalted butter
1 tablespoon active dry yeast
1/2 cup (packed) brown sugar
1/4 cup warm water
2 tablespoons vegetable oil
1 large egg, room temperature
1 teaspoon salt
5 cups unbleached all-purpose flour

Filling
4 tablespoons unsalted butter, melted
1 1/4 cups (packed) light brown sugar
1 1/2 tablespoons cinnamon
1 cup raisins, plumped in hot water and drained
1 cup chopped pecans

Glaze
1 1/2 cups powdered sugar
5 tablespoons milk
2 tablespoons real maple syrup
1/4 cup cream cheese, softened
1/4 teaspoon salt

In a medium saucepan, combine the sweet potato chunks with water to cover. Bring to a boil, reduce heat to low, and cook uncovered about 20 minutes. Drain the sweet potato, reserving 1 cup of the liquid. let the potato water cool to warm. Meanwhile, process the sweet potato with the butter in a food mill placed over a large bowl, or purée in a food processor until smooth.
Pour the warm water (not the potato water - the other 1/4 cup) in a small bowl. Sprinkle the yeast and a pinch of the brown sugar over the surface of the water. Stir to dissolve and let stand at room temperature until foamy, about 10 minutes.
In a large mixing bowl with a whisk or in the work bowl of a stand mixer fitted with paddle attachment, combine the pureed sweet potato, the potato water, yeast mixture, the remaining brown sugar, oil, egg, salt, and 2 cups of flour. Beat hard to combine, about 1 minute. Add the remaining flour, 1/2 cup at a time, until a shaggy dough that just clears the side of the bowl is formed.
Turn the dough out onto a lightly floured work surface and knead until smooth and springy, about 4 minutes, dusting with flour only 1 tablespoon at a time as needed to prevent sticking. If kneading by machine, switch from paddle to dough hook and knead for 3 to 4 minutes, or until the dough is smooth and springy and springs back when pressed. If desired, transfer the dough to a floured surface and knead briefly by hand.
Place the dough in a greased deep container. Turn once to coat the top and cover with plastic wrap. Let rise in a warm place until doubled in bulk, 1 to 1 1/2 hours. Gently deflate the dough and let rise a second time until doubled in bulk, 50 minutes to an hour.
Gently deflate the dough. Turn the dough out onto a lightly floured work surface. Divide the dough into two equal portions. Roll out each portion into a 10-by-14 inch rectangle, at least 1/4 inch thick. Brush the surface of each rectangle with the melted butter. Sprinkle the surface of each rectangle evenly with half of the brown sugar, cinnamon, raisins, and pecans, leaving about 1 each around the borders. Starting from the 10 inch end, roll the dough up and pinch seams together. Using a sharp knife, cut each roll into 1 inch slices. Place each slice on baking sheet, at least two inches apart. Cover loosely with with plastic wrap and let rise at room temperature just until puffy, about 20 minutes.
Twenty minutes before baking, preheat the oven to 350 degrees. Place the baking sheet on a rack in the center of the oven and bake 30 minutes, or until golden brown and firm to the touch. Prepare glaze by combining the powdered sugar with milk, syrup, cream cheese, and salt, whisking until smooth. Drizzle mixture over over rolls, and let stand until warm. Enjoy!

Saturday, December 20, 2008

Acorn Squash, Two Ways


We had a brief respite from the "arctic onslaught" yesterday, and I was able to zip around and get some errands done, enjoying the sun (!) around Portland. But, much to my delight, I woke up this morning to white flurries riding the wind outside my bedroom window - and a few inches on the ground. I'm so in love with snow, that I really don't mind that Portland ceases to function under these conditions. It means more time to read, more time to finish holiday presents, and more time to cook!

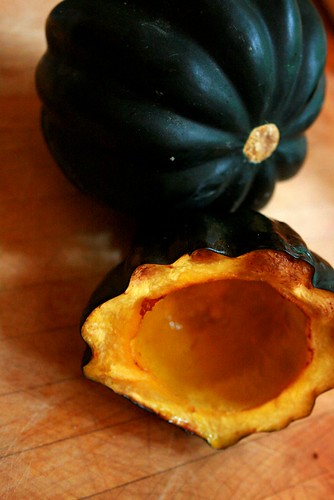
This morning's Farmers' Market would have been all about winter squash - the sturdy champion of these wintry days and nights - and I'm pretty sad I didn't get a chance to thank all of my favorite farmers for a great year. I thought I'd commemorate the end of market season by roasting a sweet little acorn squash, and proving that these guys are a food of many hats by doing a savory and sweet rendition for each half.

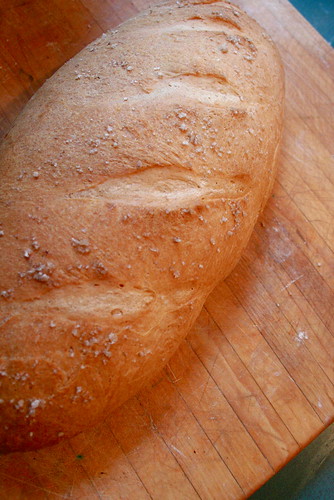
For the savory side, I crafted an open-faced sandwich using fresh Tuscan Peasant Bread that I made this morning. If you couldn't tell, I'm having the time of my life baking every day. I'm usually running around Portland, hopping from one task to another, that the though of making bread seems like an indulgence I don't have the time for, seeing as I'm rarely in the house for a few consecutive hours. But this week, what with this lovely winter weather that has shut down the city, I've got all the time in the world - what's a two hour rising time when I'm snowed in for the whole day?


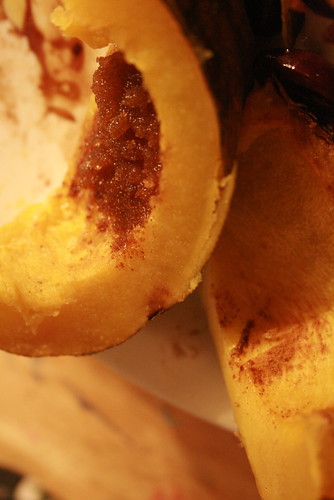
Plus, I was able to roast my squash in the oven while the bread was baking. Hooray for multitasking. I didn't do anything fancy with the acorn squash - just cut it in have, scooped out the pulp, and dotted each with a pat of butter and some kosher salt. I nestled the halves into a shallow pie pan filled with about a half inch of water. The bread was baking for an hour at 425 degrees, so I left the squash in for the same amount of time. It's kind of hard to screw up winter squash.


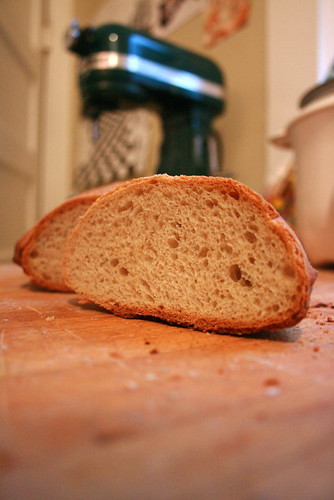
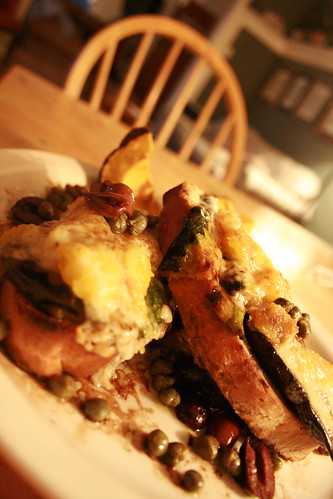
I used Beth Hensperger's Tuscan Peasant Loaf recipe from (where else?) the Bread Bible, though I like to add a touch more salt and replace the sugar with honey. This bread has a great crust and a dense crumb - perfect for sandwiches! I took two big slices of the bread, brushed on a bit of olive oil and rubbed the slices with garlic. I layered on roasted zucchini, slices of one half of the acorn squash, and some slices of really good local havarti from Willamette Valley Cheese Company - my absolute favorite cheese - and popped it under the broiler for a minute, until the cheese was golden and the bread was toasty.

I mixed up some halved kalamata olives, capers, and balsamic vinegar to drizzle over the top. Yum. The zucchini, squash, and cheese melted together to a really creamy consistency, perfectly set off by the crunchy bread. This was SO filling, I had to put a half back in the fridge for later. I'm sure it will be just as good in a few hours.


For the sweet side, I called upon my mom's old trick to get us to eat banana squash - her's and everyone else's moms' - by sprinkling the other half with brown sugar and cinnamon. Nothing to it - creamy, sweet, a little salty, and a perfect accompaniment to the open-face sandwiches. No one could complain that it was the same ingredient twice - and it's a treat that would get anyone through a winter of squash!


Eat Well!

Friday, December 19, 2008

Challah French Toast with Sauteed Apples


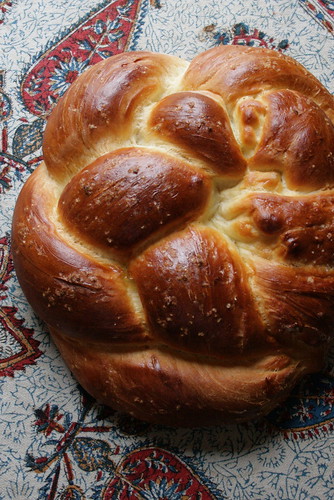
Ah, winter bliss. Finals are over, and I'm snowed in with plenty of time to bake in a warm kitchen. Honestly, I don't know how these few days of vacation could get any better. Oh wait, yes I do - Challah! I adore making challah. There's something so satisfying about putting together a few simple ingredients and making something that tastes just right every time. It's such a familiar taste, sweet, eggy, fluffy bread - with a bit of honey it tastes like every great challah I've ever had.


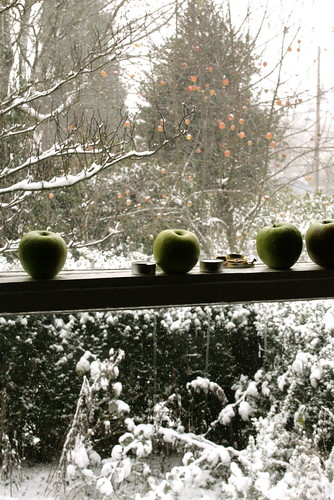
With the snow falling outside, I'm just about falling apart with happiness. Portland is really beautiful in the snow, though I have to admit I haven't seen much of it. I have this fear of being in vehicles in the snow, so I've been stuck within a mile's radius of my house since last weekend. Luckily, everything I need is within walking distance, and it's really fun to get all bundled up to walk like a penguin to the coffee shop for hot chocolate while my bread rises.

I used my no-fail challah recipe from Beth Hensperger's Bread Bible. EVERYONE who wants to dabble in home bread baking needs this book, and since I didn't change the recipe at all, I'll encourage you to go find your own copy. Hint - it's also on google books.

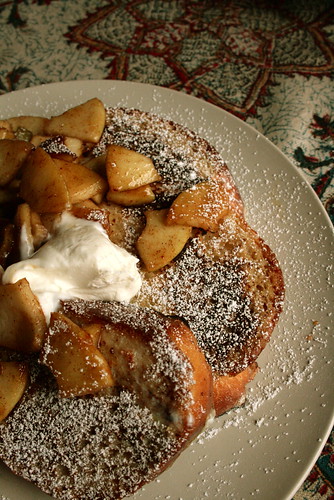
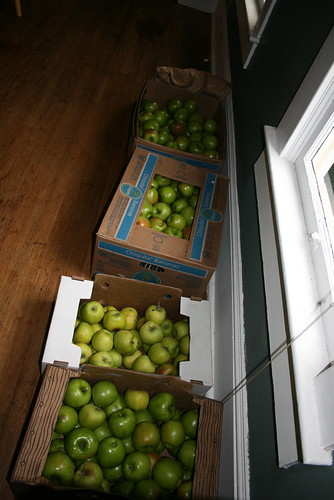
Plus, when you make challah, that means you get to make challah french toast! I'm STILL working my way through a big box of apples (yes, the same apples from the great Thanksgiving Pie Event). Winter fruits and vegetables are miracles, honestly. Anyway, I thought I'd make a sauteed apple syrup for my french toast, and it turned out so well, especially with a bit of creamy yogurt. I'll make it through this winter, farmers market or not. If every morning could be like this morning, I don't think I'd have any problems at all.


Stay warm, drive safely and eat well!

Here's the recipe for my challah french toast. Perfect thing for a lazy, snowy morning.

Challah French Toast with Sauteed Apples

Ingredients
5 eggs
1 cup half-and-half or milk
1/2 teaspoon pure vanilla extract
1 large loaf challah
Unsalted butter
Vegetable oil

For topping:
4 large apples
1/2 cup sugar
1 teaspoon cinnamon
2 tablespoons butter

Optional: greek yogurt, whipped cream, Crème fraîche, or vanilla ice cream, if you dare.

Directions
Preheat the oven to 250 degrees F.

In a large bowl, whisk together the eggs, half-and-half, and vanilla. Pour mixture into shallow container, like a pie pan or deep plate. Slice the challah into thick slices, and soak slices in the egg mixture for 5 minutes, turning once.

Heat 1 tablespoon butter and 1 tablespoon oil in a very large saute pan over medium heat. Add the soaked bread and cook for 2 to 3 minutes on each side, until nicely browned. Place the cooked French toast on a sheet pan and keep it warm in the oven. Fry the remaining soaked bread slices, adding butter and oil as needed, until it's all cooked.

Peel, core, Chop apples. Melt butter over medium heat. Add apples and cook until almost soft, about 6 minutes. Stir in sugar and cinnamon, and cook until combined and syrupy, about 2 minutes. Spoon over french toast and serve with creamy topping of your choice. Dust with powdered sugar, and enjoy!

Last Portland Farmers' Market CANCELLED

I've got some sad news to report to my Portland readers. My friends at Portland Farmers' Market just informed me that this Saturday's Solstice market - the last scheduled market of the year - has been cancelled due to this wintry weather.


Frozen, snow covered fields and transit roads have made it difficult, if not impossible for the farmers to harvest and deliver crops for this weekend's market. The forecast indicates more ice and snow is on the way this weekend. In the interest of vendor and shopper safety, market staff have regretfully decided to cancel the last market.

It's been such a great market year - the kids cook classes, the great music, saying hello to new vendors and staff and saying goodbye and thank you to old friends. I'd like to thank everyone at PFM for allowing me to help out, even if my hands are still burning from shucking all of that corn straight off the grill. You guys are my heroes, and you know I'll show up bright and early to document the opening day of our 19th year.


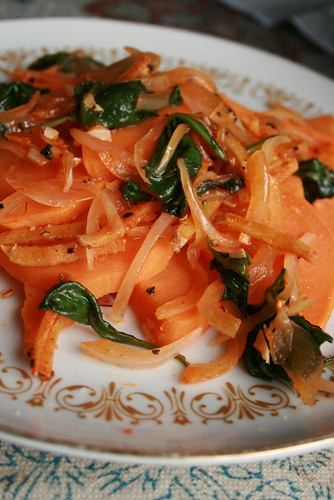
My sad backyard garden, and my happy, oddly orange, kitchen.

Please join me on March 21, 2009 to welcome a new year of harvest, friends, and fun. Until then, we'll have to get our root vegetable, squash, and bean fix at some of our fantastic local grocers.

Help me spread the news about this weekend - I wouldn't want a bunch of hungry people showing up to an empty lot of ice and snow.

Happy Holidays, and keep eating well!

Wednesday, December 10, 2008

Cauliflower-Garlic "Mashed Potatoes"


This weekend is going to be a cold one in Bridgetown! Stay warm, wherever you are, and find comfort in the reliability of winter veggies - warm squash, roots, tubers, and the noble, sturdy cauliflower!

Here's a fun recipe for this seasonal staple. I picked up a few big beauties at the farmer's market this week, and thought I'd try an old favorite - mock mashed "potatoes". I like this recipe because it uses the whole vegetable - cauliflower leaves and all. I always feel funny not using large parts of my fruits and vegetables, even if I try to make broth with them, but the fabulous Lynne Rossetto Kasper solves that problem by steaming the leaves right along with the cauliflower. Because of this, the end product doesn't look much like mashed potatoes - the greenish tint ruins that illusion - but the texture is really satisfying when you want a big bowl of mash, guilt free, and the leaves add extra fiber.

If you don't use cauliflower often, you should really consider adding it to your repertoire. It's inexpensive, filling, and takes on a fantastic creaminess when cooked. I also like to toss cauliflower florets with olive oil, salt, and cumin, and broil until browned and a bit crispy. Perfect for a quick snack or a simple side dish, this wins over critics every time. Experiment with different seasonings - cauliflower goes really well with a variety of flavors. Here, it pairs well with nutmeg - and plenty of garlic.

Cauliflower-Garlic "Mashed Potatoes"
© 2005 Lynne Rossetto Kasper

Serves 16 to 18 as part of a large menu

2 large heads cauliflower (preferably organic)
10 large cloves garlic, thinly sliced
Salt
2 tablespoons good-tasting butter
6 tablespoons good-tasting extra-virgin olive oil
¼ teaspoon freshly ground nutmeg
Freshly ground black pepper to taste

1. Cook in two batches. Set a collapsible steamer basket in a 6-quart pot. Add water to come just above the bottom of the steamer. Cover and bring to a boil. Meanwhile, wash cauliflower and its leaves. Cut leaves into thin slices. Break cauliflower into flowerettes.

2. Drop leaves onto the steamer and sprinkle lightly with salt. Add half the cauliflower, all the garlic, then remaining cauliflower. Sprinkle lightly with more salt. Cover and steam over medium-high heat 8 minutes, or until cauliflower is so tender a knife just slips into it.

3. Drain in a colander, turn into a food processor fitted with the steel knife, and add butter and oil. Puree until smooth. Season to taste with pepper, nutmeg, and more salt if needed. Serve immediately, or refrigerate, covered, and reheat later.

Tuesday, December 9, 2008

Cocoa Agave Banana Oat Nut Bread


Classes are almost over!

I came home today, cold and excited to be in my warm kitchen with a few hours of free time before finals really hit. I'd planned on cleaning up the house today, and in the process of tidying the kitchen, I came across a plastic bag with three very ripe bananas. We're always scrounging dollar bags of just-past-perfect bananas, which are perfect for baking. Especially when they are sitting behind the fruit bowl in a twenty-somethings' kitchen for a week. Right.

So in the pursuit of cleaning, and making the house smell fabulous whilst I do so, I decided to try a new banana bread recipe. I know I've posted a similar recipe before, but this time I decided to use 100% whole wheat flour, replace all of the sugar with agave, and use olive oil - I'm telling you, this was one healthy loaf of bread. Normally when I cook with these ingredients, it's something I whip up when I want something for myself. I'll pull out all the stops - butter, sugar, chocolate, cream - for my friends and family, but there's something really rewarding about cooking with whole foods that my body really craves.

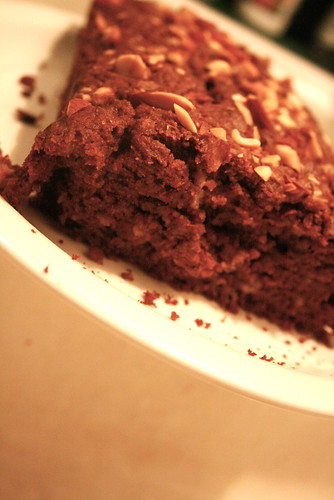
I used olive oil, agave, two fresh, organic eggs, unsweetened cocoa powder, whole wheat flour, oats, almonds, and bananas. Three whole bananas, in fact, which I think made it possible to use less sweetener. The prep for this bread took all of five minutes, and it popped in the oven for an hour while I did all my cleaning. Soon, the smell of toasted nuts met me as I swept the living room, and I crept back into the kitchen to check on the oven. It looked great, and the smell was fantastic, so I figured, even if it tasted "super healthy", it'd be a success. Boy, did I underestimate this little guy.

Sweet and moist with a hint of cocoa and toasted nut crunchiness, I wouldn't think twice before serving this to my friends. Or, maybe giving mini-loaves to my professors. It couldn't hurt!

Eat well, stay warm, and enjoy your week!

Cocoa Agave Banana Oat Nut Bread

1/2 cup agave nectar
1/3 cup olive oil
1 teaspoon vanilla extract
2 eggs
2 tablespoons unsweetened cocoa
3 very ripe bananas
2 cups whole wheat flour
1/2 cup whole oats
1/2 teaspoon salt
1 Teaspoon baking soda
1/2 cup chopped almonds, plus more for sprinkling on top

Preheat oven to 330
Sift together flour, baking soda, and salt. Mix in oats and set aside.
In a large bowl, beat oil and agave nectar. Add eggs one by one and mix well. Mix in bananas, cocoa and vanilla, making sure everything gets incorporated. Stir in flour/oat mixture and nuts. Grease a regular loaf pan, and pour batter in, spreading evenly.
Sprinkle with remaining chopped nuts.
Bake for 50-60 minutes, until an inserted toothpick comes out clean. Enjoy warm or wait a while for the flavors to blend.

Monday, December 1, 2008

Sweet Potato Ginger-Stick Curry


Leave it to Lynne Rossetto Kasper to figure out what my stir-fries have been missing. I've been cooking my way through The Splendid Table's new cookbook, How to Eat Supper, and there has been no shortage of epiphanies and inspiration. I'm always looking for more things to do with sweet potatoes (she calls them yams) because I find myself buying more every time I go to the store. They are just so comforting, healthy, and they last forever. Sweet potato fries are a regular event at my house, but they never seem to fully explore the potential of the ingredient.

In this recipe, the fantastic Lynne treats the humble sweet potato the way it should be treated - with tons of flavor and complexity. Don't get me wrong, I find myself dreaming of a simple baked potato with butter and brown sugar a bit more than I'd like to admit, but all too often the tuber is tossed to the side. Here, it's the star.


She calls it a curry, which I suppose it might be and I'm just not up on the full range of uses of the word, but the strongest flavors are ginger, jalepeño, basil, and lime. Yum. The key here is the ginger - the recipe calls for ginger "peeled and sliced into paper-thin matchsticks". Luckily, I have a good knife, but I see how it might be a challenge.

Lynne says:
Cutting the ginger into paper-thin matchsticks may seem fussy, but there is method to what seems to be madness. That shape changes how you taste the ginger in this dish. Crushed or chopped ginger would taste different - an interesting thing to remember when you see very specific instructions like these in Chinese recipes. There's always a reason.
I made this dish twice, once as a simple stir fry and another to make lettuce wraps, where I pared it with fresh sliced cucumber, cashews, and yogurt in fresh butter lettuce leaves. Sadly, the book is due back to the library today, and the hold list is miles long, so I can't renew. My birthday's tomorrow, maybe I'll get my own copy. Hint hint.


Eat well!
Sweet Yams in Ginger-Stick Curry

Yams
4 quarts salted water
2 large Garnet or Jewel yams (about 1 3/4 pounds), peeled, halved lengthwise, and cut into 1/4-inch-thick half-rounds.

Curry
Extra Virgin Olive Oil
One 1 inch piece fresh ginger, peeled and sliced into paper-thin matchsticks
4 large garlic cloves, sliced paper thin
1 jalepeño, sliced very thin
2 whole scallions, cut into 1-inch lengths
2 large shallots, sliced thin
Salt and Pepper
1/2 light-packed cup fresh basil leaves, course chopped
Juice of 1 lime

1. Bring water to boil.
2. Once water is bubbling fiercely, drop in the yams and cook them at a hard bubble for 10 minutes, or until tender. Drain in a colander and turn into a serving dish. Set the pot back on the stove.
3. Generously film the pot with oil. Set it over medium-high heat and add the ginger, garlic, jalepeño, scallions, shallots, and generous sprinklings of salt and pepper. Saute for two minutes, stirring often. Then cover the pot tightly, reduce the heat to medium low, and cook for 5-8 minutes, or until the ginger has softened.
4. Stir in the basil and cook, uncovered, for no more than 30 seconds. Spoon curry over yams, and squeeze lime juice over the finished dish.

Saturday, November 29, 2008

Happy Birthday Muffins!


Today is my roommate Dragonfruit's birthday, a perfect morning mid-way through a long weekend, when we realize we still have two days of relaxation ahead of us. Why not spend a few minutes making warm, filling breakfast muffins for one of my best friends, simply because she deserves it. Oh, and because I still have a giant box of local apples sitting in my living room. 

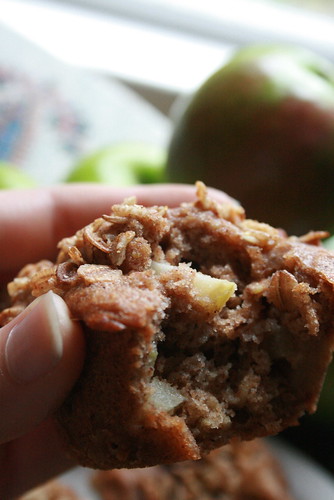
I'm pretty sure everyone in my life is tired of sugary, apple-y baked goods. I know apples will last forever, but I can't justify buying more fruit until I've used up the box. The solution? Whole-wheat and multigrain spice apple muffins, made with nonfat yogurt and sweetened with a bit of agave. They were perfect, the apples were sweeter for the lack of sugar, and the oat crumble topping was deliciously crisp with a touch of salt. 

I had originally wanted to grate the apples, and I would really recommend it if you have the time or desire - it would distribute the sweetness throughout the muffin. To save time, using my trusty apple-peeler-corer-slicer, I chopped the apples into a small dice - little gems of fruit in the finished muffins. 

I used an organic whole multi-grain hot cereal blend from Trader Joe's - with barley, rye, oats, and wheat - and organic blue agave nectar. Try these when you want something wholesome and hearty - perfect for a cloudy late fall (fine, winter) morning with good friends and tea. 

Organic Multigrain Apple Muffins with Agave

Batter:
1 1/2 cups 100% whole wheat flour
1 cups organic multi-grain hot cereal blend (or steel cut oats)
1 1/2 tsp cinnamon
1 tsp nutmeg
1 tsp ginger
1 tsp baking soda
1/2 tsp salt
1/2 cup canola oil or non-hydrogenated margarine, melted
1/3 cup organic agave nectar
2 large organic eggs
1/2 cup milk (cow, soy, or almond all would work)
1/2 cup plain yogurt (any kind - I used non-fat)
1 tsp vanilla
1 1/2 cups grated or diced apple pieces

Topping:
1 cup multigrain cereal or oats
2 tbsp agave nectar
1/2 tsp cinnamon
1/4 tsp salt
2 tbsp canola oil or melted margarine

Preheat oven to 325.

In a large bowl, whisk together grains, flour, baking soda, salt, and spices. Stir in apple pieces. In a standing mixer or in a large bowl with a whisk combine the oil, agave, eggs, yogurt, milk, and vanilla. Fold in the dry ingredients until just combined. Mix together topping. Pour into muffin tins and sprinkle with topping.
Bake for about 25 minutes or until golden brown - these are best after they've had a chance to cool in the pan, as the flavors combine and they are much easier to remove. Enjoy!
Friday, November 28, 2008

Thanksgiving: The Great Pie Challenge

I've been drowning in pie.


In the last week and a half, I've made more than thirty five apple pies. Vegan crumble apple pies, to be exact. How does one person find the need (or time) to make that many apple pies? Well, it all starts with four big boxes of apples, a bit of elbow grease, and a little help from a simple - but mighty - kitchen tool.

Every year, a group of young Portlanders I used to live with throw a Thanksgiving dinner for about 300 people the Sunday before the actual holiday- complete with deep fried turkeys, stuffing, mashed potatoes, green bean casserole, sweet potatoes, cranberry sauce, and, four two years running, 25 of my apple pies. I don't know what had initially driven me to take on a task like this, but I credit that initial impulse for my current penchant for baking. I was never much of a baker before college - usually leaving the holiday cakes and pies to my sister or, more often, Marie Callender's - but there is quite the tradition of Apple Pie in my family, and the instinct was tested in the toughest of baking challenges - vegan holiday goods, and lots of them. 

My tried and true recipe is very loosely based on this one, and it has since evolved into a slap-dash memorized assembly of a few simple ingredients, mixed together without much actual measuring, but it always seems to come out well. I'm proud to say I'm now one of those women who has a pie recipe that I couldn't share with anyone - not that I don't want to, but if pressed, I don't think I could actually recall any actual quantities or cooking times - I just do it the way I've been doing it for years: good ingredients, messy countertops, an eye for when it "just looks right".


My crust is hand-made, part white part whole wheat flour, with vegan margarine that lives in the freezer up until I need it, a pinch of salt, and ice water. The margarine is scooped on top of the flour and salt, straight out of the tub without any actual measurements - just a spoon, until it's "enough". Then it's all rubbed together with my fingers and pulled together with ice water. It's then popped back into the freezer until I'm ready to roll it out - sometimes the next day, sometimes the next week, sometimes in 15 minutes. Yeah, I know a bunch of bakers who would really cringe at my crust method, but it works! Every time! 

My real secret is the filling. 


This little gadget is one of my all-time favorite kitchen tools, and probably the only reason I can cook so many pies this time of year. It peels, slices, and cores the apples, big or small, and it only takes a few passes with a knife to make the preferred small segments of apple for the filling. I pre-cook the apples and use a streusel topping, again, no measurements to be found. Sometimes there's four apples in a pie, sometimes six. My grandma used to piles in raw apples with cinnamon and sugar, and it would cook down in the crust - a mountainous pie would go in, and a much smaller pie would come out, with the individual apple slices standing on their own. Her's was great, but I love a bit more cohesive filling, so I saute the apples in a little more margarine, sugar, cinnamon, and a bit of flour. This gives the fruit it's own syrup, and the pies stay roughly the same shape as they cook - a perfect base for my really simple crumble topping - just margarine, flour, and sugar! All told, that's six ingredients, seven if you count water, and after a while I get into a groove and the pies come out of the oven eight at a time. 

The day of the feast, I showed up with my pies in tow, and began serving to a long line of hungry people. 34 minutes later, 15 hours of pie baking was devoured without a moment to snap a picture. Yep. This is a blog without a photo of the final product. What can I say? Some things are best left to the imagination, and the image of row after row of pie on my kitchen counters and dining room table were quite the sight to see.

I made about ten more throughout the week for my housemates and my "real" Thanksgiving with my friends, which was a fantastic event full of music, monkey-bread, and two HUGE turkeys. Something about the day caught me up in the moment, and I felt no desire to be separated from the action by a camera lens. Yes, the biggest food holiday of the year passed by with not so much as a full-table food shot. And I don't feel guilty about that in the slightest. 

So, one holiday down, a few more good ones to go before my favorite - the new year. This season means pie season, and the smell of spiced apples isn't going to fade from my kitchen any time soon. Assembly-line baking does have it's zen element, but let's just say I'm done with pie for a while. At least until December. 


Happy Holidays, and Eat Well!

Wednesday, November 12, 2008

A Diamond Birthday


Oh, there has been so much to celebrate in the past few weeks! The beginning of the holiday season (marked in Portland by the onslaught of rain and the Thanksgiving & Christmas issues of my favorite foodie magazines, among other signs), the outcome of the election (I'm still floating in a state of red-white-and-bluephoria), and, this past weekend, my Grandmother's 80th birthday!

My grandmother is an amazing woman.  She is one of the strongest women I know, a breast cancer survivor, with a PhD in her pocket, and countless students inspired by her passion. A teacher, a poet, an entrepreneur, a mom, aunt, grandmother, great-grandmother, with eternally classic style and the best hugs around. The party was really a testament to the amazing community she had a part in creating, with four generations of the clan in attendance (with a gaggle of great-grandkids in tow), artists, musicians, craftspeople and academics of all varieties, and of course, TONS of food.

I flew down to Southern California to join my family in the celebration, which for us means preparing food for 24-hours straight for 80 party guests. No catering here, my friends, and nothing frozen, pre-packaged, micro-waved - though some doubting individuals tried to sneak in some bite-sized frozen shrimp snacks into the mix. Not while I'm on appetizers! I spent the week ahead plotting my attack, looking forward to the never-ending bounty of Southern California produce - strawberries and asparagus in November? I'm still flabbergasted - and crafting a few tasty dishes to feed the army of party-goers.


My older sister was on dessert - and cranked out 8 gorgeous classic Pineapple Upside-Down Cakes, the kind with the maraschino cherries in the center of pineapple rings, and a Four-Layer Carrot Cake with Pine Nuts and Cream Cheese Frosting - SO good, and I'm sure the house still smells like yellow cake (the tasty baked good, not the enriched uranium ore). My dad was manning the grill - enough lamb and chicken kabobs to feed about three times as many people as we were expecting.

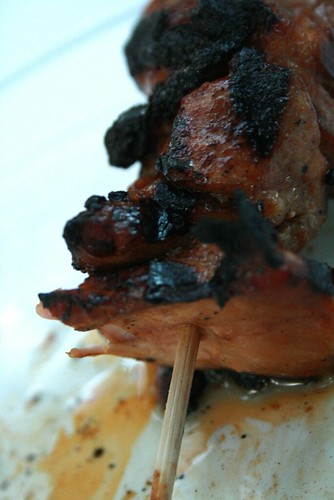
The lamb had a red-wine, garlic, and rosemary marinade, and the chicken got a soy, ginger, and garlic treatment. My mom made a HUGE pasta salad - we were all amazing at how much pasta three bags made - and my little sister was the all-around champion of veggie-plates, odd-jobs, and official taster. Aunts and cousins brought cheese plates, crackers, beautiful fruit, famous rice salads, a keg of local brew for the big kids, and a box of "bunny noodles" for the little ones. Some families gather around sports teams, some around religious traditions, but for us, it's all about the food. 


My dishes might not have been the main attraction, but I was pretty pleased with them, and the way they disappeared, I'm guessing a few other people were as well.


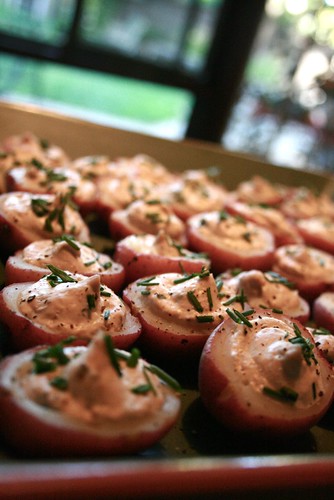
First up - Deviled New Potatoes! These little guys started off as 40 small, adorable new potatoes, boiled until just tender, and chilled overnight. The next day, I used a melon baller to hollow out the centers. I reserved the scooped-out potato to add to the filling, which was really delicious. I sautéed three sliced leeks and four big shallots in olive oil, seasoned only with black pepper and kosher salt. After this mix started to brown - and smell amazing - I deglazed with a few tablespoons of good red wine at a time, allowing the liquid to evaporate before adding more, until I'd used about a cup. This mix went into the food processor with capers, basil, fresh meyer lemon juice, the reserved potato centers, and cream cheese. After the mix was thoroughly blended, I packed it into a big ziplock bag and piped the filling into the potato cups, sprinkled with chives, and moved on to the next dish...


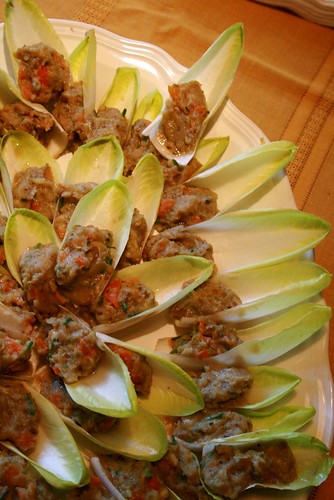
Endive Boats with Roasted Garlic, Eggplant, and Orange Bell Pepper Puree. These were so fun to eat - the individual endive leaves were the perfect size for a little scoop of the savory filling. I roasted two whole eggplants, about 8 garlic cloves (peeled, and wrapped in a packet of tin foil with olive oil) and three orange bell peppers at 400 degrees for about 35 minutes. Everything went into the food processor with cumin, more olive oil, capers, lemon juice, and a but of curry powder. Yum!

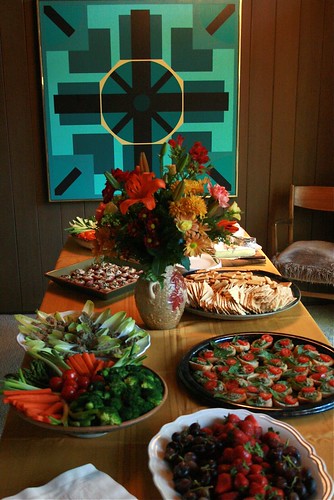
My last dish was a simple bruschetta, with olive tapenade, tomato, and basil. I made the tapenade using three kinds of olives - kalamata, brined green, and black, a can of each - all pitted. I threw these in the food processor with fresh garlic, anchovies, lemon juice, capers, basil, and a good amount of olive oil. This stuff was strong, in a good way, so I put about a teaspoon on a fresh basil leaf on each toasted baguette slice - topped with a slice of cherry tomato. Classic, simple, and delicious - brought to you by California sunshine. So jealous.

It was a great party - 80th is the Diamond Anniversary. Sorry you didn't get any diamonds, grandma, but I hope you loved the good friends, good beer and wine, and great food as much as I enjoyed helping out. Even now, as I sit looking out at the Portland rain, roasting a pumpkin in the oven, and I can still feel the warmth of the grill and the California fall, hear the babies playing, and see my grandma's smile as she popped the champagne. 

May we all live to be as successful and beautiful. Eat well!

Tuesday, November 4, 2008

VOTE NOW

...and the race is on.

Remember to vote today, this is big!

Monday, October 27, 2008

I'm back! How 'bout some pumpkin?


Oh, hello again dear ones. I've missed you.

I've been back to school, back in California for a bit, back into the busy world of Portland in Fall. The leaves are amazing right now, and I've found myself more than a few times walking through the leaf-strewn parking lot at school thinking about Lemonbasil and how I've missed writing for all of you. I'm not going to make this a big sad post full of excuses for my absence, but let's just say I'm happy to back in the kitchen, cooking with all the amazing things this season has to offer.

I'd like to take the next few weeks to highlight some special recipes that will be featured at the Taste the Place booth at the Portland Farmers Market - I've been asked to gather some recipes to print so market-goers can make their own fall recipe books - we'll provide the binding, covers, and the recipes, and anyone can gather around and compile their books to their own taste preferences, and hopefully come across something new. I'm trying to craft some of my own recipes, in addition to sharing my favorites from my cookbook collection and, of course, all the blogs I worship. I hope you enjoy my spins on classic fall flavors!

First up, the pumpkin! This week is all about the orange guy - acorn, butternut, and delicata will all have their turns, but Halloween is coming this Friday and I'm going to make the most of the October-est of squashes.

Yes, fall means the smells of pumpkin pie, complete with cinnamon, nutmeg, cloves, and chocolate. Wait. Chocolate? Yes. Chocolate. I've had some pumpkin puree sitting in the fridge for a bit, and was craving something chocolate-y. You know what I mean. So I opened the cupboards and found some odds and ends that might make a yummy, healthy treat. These Pumpkin Pecan Cocoa Muffins are made with 100% whole wheat flour, sweetened (partly) with honey, and are ready in no time. The pumpkin puree keeps them so amazingly moist - I even stirred them a bit too much (or, rather, let my lovely stand mixer, Julia, stir them a bit too much) and they still came out tender and delicious.


Thanks for reading, and come back soon for more of the best of this season's best ingredients. Eat well!

Pumpkin Pecan Cocoa Muffins
(makes 12-15 full sized muffins, depending on size - and how much of the batter you eat)
1/2 cup Pecan Halves or Pieces
1 1/2 cup whole wheat flour
1/2 cup organic sugar (white or brown, whatever you have) plus a bit more for sprinkling
1 teaspoon baking powder
1 teaspoon baking soda
3 tablespoons unsweetened cocoa powder
1 teaspoon cinnamon
1 teaspoon nutmeg
1/2 teaspoon salt
2 eggs
1 cup pumpkin puree (more or less - I used a bit more - find out how to make your own here)
1/2 cup canola oil
1/3 cup honey

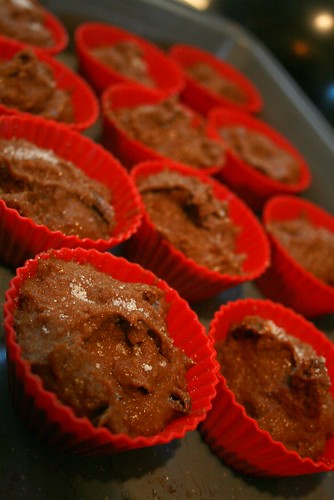
Preheat oven to 350 degrees. Place pecans on baking sheet and set in warming oven - don't forget them! They'll be toasted by the time you need to mix them in. Spray your muffin pans, use paper liners, or those fancy silicone baking cups (love them - they're reusable and theres much less cleanup!)

In the bowl of your stand mixer or with a large bowl with a whisk, sift together flour, baking powder, baking soda, spices, salt, and cocoa. Add pumpkin, eggs, oil, honey into the same bowl (you could beat them separately - but I just threw them into the mix and it worked really well). Mix until just combined, and stir in pecans. Spoon into muffin cups to your preferred amount - I like mine almost full. Sprinkle with a bit of sugar - it won't seem to do much to the look of the uncooked batter, but when their baked they look so pretty - you can really see a difference.

Bake for about 20 minutes - they should spring back when lightly pressed in the tops. Enjoy!

Wednesday, October 1, 2008

Shana Tovah!

Happy New Year! And, woah! Hello October!

Monday night, I got together with a bunch of friends from school for a rockin' Rosh Hashanah party - and I was asked to make dessert! Ah, yes. Long gone are the days of simple invitations, a kindly "won't you stop by?" Nope. Now it's, hey, Oakley, what sweet thing can you whip up for this event?


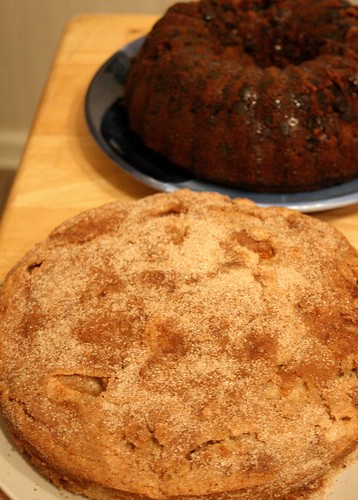
Ah, I kid. I love love love special occasion baking, especially when I get to research traditional dishes and put my spin on them. Rosh Hashana is all about sweetness, epitomized by apples and honey. I decided to make two cakes, a twist on a traditional Rosh Hashana honey cake with cocoa and lots of spice, and a simple apple cake with some of the best local apples I could find. Both were gobbled up with thanks and praise, signaling the official start of the holiday season.


Oh, holiday baking. You have been missed. All of a sudden, I'm having dreams of the twenty-five vegan apple pies I made for Thanksgiving last year, and the tons of pomegranate scones, not to mention gingerbread cookie bakes and shortbread wedges that are IMPOSSIBLE to stop eating. I'm looking forward to some interesting concoctions this year (Can I bake with Winter Squash? What else can I throw beets into? Will I finally tackle the quince?), but this month is all about the harvest. Sukkot's coming up, gotta make some goodies to break the fast next week, and traditional High Holiday foods are taking up a lot of my mental counter space.


My spiced chocolate honey cake and apple cake went really well with the hostess' AMAZING brisket, fresh apples and honey, some of the BEST challah I've ever had (complete with lemon honey butter - yum!) and some really great sides - beet salad with beef, pomegranates, hummus and pita, and good olives.


Ah, what a meal. Made all the better because it was shared with friends and tradition.

Enjoy the onset of fall, the holiday season, and have a sweet new year! Shana Tovah!

The recipe for the Spiced Chocolate Honey cake can be found here and the Apple Cake is here.

Sunday, September 28, 2008

Sustainability on a Budget


One of the most common misconceptions about sustainable living is that it has to cost a fortune. In reality, every individual and family can live an eco-friendly, healthy life. I should know, I'm a college student on a pretty tight budget, but I still eat really well - and feel good about all of the food I buy. Here are some tips I scrounged up to help you bring SOLE (Seasonal, organic, local, and ethical) food to your family without breaking the bank:

1. Limit processed foods – when you buy processed foods, you are paying for packaging, preservatives, and transportation. When you eat fresh, whole foods, you get more for your dollar, and you're eating what nature intended. This doesn't have to mean cutting out convenience. Fruits, veggies, and nuts are just as portable as a granola bar, but they'll cost a lot less and fill you up more.
2. Eat with the Seasons – eating seasonally means buying healthy, delicious foods when they are at their peak, which saves money and connects you to your local environment. There are loads of resources out there to help you pick foods that are in season in your area, but nothing is simpler than heading out and seeing for yourself. Check out your local farmers market and see what the local farms are offering right now. Better yet, find out what they're drowning in - the most plentiful crops will often be the least expensive. Talk to you farmers - they want to help!
3. Eat Locally – By supporting local farmers and producers, you cut out the middleman and gain access to the freshest, most nutritious foods. The longer food takes to get from the farm to your plate, the less nutrients and vitamins are in that food. I'm totally a cheater on this one, because I often buy foods that are a bit past their prime (hooray for dollar bags and market mark-downs!), but a good amount of my food budget goes towards the freshest food possible.
4. Make your own - Starting with one food at a time, find replacements for packaged goods you’d normally buy at the supermarket, including bread, cereals, crackers, and canned beans. I'm planning on making my own crackers soon, and I don't think anyone can argue that homemade baked goods are so much better than the ones in packages. Eating SOLE food doesn't mean giving up taste or eating like a rabbit - it means eating great food that you can be proud of (this totally includes cookies.)
5. Buy in bulk – most stores have bulk aisles where you can save on packaging and processing. Find nuts, beans, rice, grains, and granola without the waste, and save money. This morning I threw a pot of Oregon wild rice on the stove, and it will last me through the week. If that's not convenience and taste on a budget, I don't know what is.
6. Grow your own – Growing your own fresh foods can be so rewarding, and everyone can do it! From a few containers of herbs on your patio or kitchen counter to a full garden in your backyard, growing your own edibles is a creative way to save money. Kids love helping out, and it teaches everyone what's in season - plus it's a great way to prove that local just plain tastes better. Tomatoes from your garden? No contest. Best tomatoes on earth.
8. Eat out less - I eat at restaurants maybe once a month (MAYBE) but I still have amazing dinners and breakfasts with my closest friends all the time, and I can tell you I don't miss the prices. Nothing beats the feeling of cooking up a great dinner with people you love. I know I'm kind of a rare breed, that spending hours in the kitchen is my idea of a day off, but it doesn't take much. If you think of yourself as a good cook, try this fun experiment - think of your favorite restaurant meal, and try to duplicate it at home with local, organic ingredients. You get to control everything about the meal, and feel good knowing that you've saved money and supported local farms.
9. Eat less meat - This one is a bit touchy for some people I know, but I can tell you, it really saves tons of money to eat animal products only a few times a week. Most of my meals are vegetarian, but when I buy meat, I try to make it the freshest, closest-to-home as possible. It's wonderful to say I know the people who buy the meat I eat, because they can tell me about their farms, their animals, and I know I'm not going to get sick from any mass-market meat scare. If you can't buy meat (or chicken, or fish, or eggs) from someone you can meet, buy organic as much as possible. Yes, it costs more. But really, if you cut back a little and find creative ways to make really filling meals without the meat, it's so worth the extra dollar to have faith in the food you feed yourself and your family.
10. Eat ugly fruit (and veggies) - This is my favorite tip. If you're a reader of my blog, you know I love to scrounge for mark-offs, dollar bags, and free tables of less than perfect fruits and veggies. Ask around at your local stores and supermarkets - they probably have an area of discounted produce. I'd tell you where I get a lot of my fruits and veggies for free, but then everyone in Portland would be competing for my bounty. That's my secret, but hey, I trust you'll find your own. It's all about being creative - a tart made with slightly ugly apples or a soup made with the farmer's less than champion squash taste just as fantastic!

Cut out the middleman! You can find affordable, delicious, and healthy foods:
- At your local farms – go to www.eatwell.com or www.localharvest.org to find local sources of everything from fruits and vegetables, to meat and dairy products. Your entire dollar goes to the farmer, and your get more value for your dollar.
- At your local Farmers’ Market – get to know your local producers, and find out about the best deals every week from the people who know the best!
- Buy a Share in a local CSA – get local produce delivered to you every week, for less than you’d pay at the store! Go to www.localharvest.com for more info.

We vote with every dollar we spend on food. When we support sustainable agriculture and organic, locally produced goods, restaurants, supermarkets, and producers respond by making more sustainable food accessible at prices that are fair to everyone. Have more tips for an eco-friendly diet on a budget? Let me know! I love to hear what other people are doing to eat in a way that makes them feel great, in their hearts, their minds, their stomachs, and their wallets!

Wednesday, September 24, 2008

Welcoming Fall With a Hodgepodge Dip


Since my last post, Portland decided that she wanted to pull out her sweaters, scarves, and fuzzy hats - It's fall! Who knows, another dry spell might be waiting around the corner, but in my house and on the streets, it seems everyone is thinking one thing: Brrrrr. It may be chilly, and the rain might be here to stay (oy), but I'm happy as can be. I've got visions of hot apple cider, kids coming 'round on Halloween, and warm root vegetables and squash. Summer was amazing, and, let's be honest, it's still only September - my tomatoes, peppers, and yellow squash are finally making a good show in the garden - but I'm ready to embrace the colder months, buy some long nubby knit socks, and fill up on heartier fare.


But before I can do that, I need to finish up the bits and pieces in the freezer, fridge, and cupboards. Such a familiar refrain, huh? When I lived alone last year, I'd always find myself throwing out things that had gone bad - especially true of fruits and veggies. I've found that the best way to avoid this is to do a round-up every few weeks of the odds and ends in the kitchen. It may not be the prettiest, tastiest dish (though sometimes it is!) it feels good to know that everything is being put to use. 


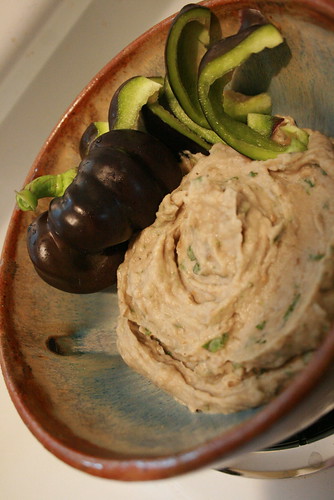
As I searched through the various shelves, I found a can of white beans, and was inspired. I had on hand a good amount of garlic, some basil from the garden, and some roasty vegetables from a Limbo dollar bag, so why not blend it all up into a dip/spread/delicious-mush-to-eat-straight-out-of-the-bowl?

I pureed a whole can of drain white kidney beans, threw in some water and red wine vinegar to get the mix going, and added some whole basil leaves and some of the roasted vegetables - eggplant, acorn squash, and roasted garlic (I had baked them for a little less than an hour in a 375 degree oven - I didn't have a timer, I just let my nose be my guide).

Oh, my. This was so good! I served it with an adorable purple bell pepper from my garden. The only problem I had was that my food processor, while being a great Cuisinart, is realllly tiny. Hey, mom? Dad? Want to help me out there? 

So here it is, the clean-sweep dish of the week, Hodgepodge White Bean, Basil, and Roasted Fall Vegetable Dip. Feel free to use whatever you've got lying around - this isn't a recipe, it's a method!

Welcome to fall! Eat well, and come back soon.

Wednesday, September 17, 2008

What do you call an upside-down upside-down cake?


Oh man, I should be working! I've been sitting in the library for a few hours, reading about Smallpox and Santa Fe, composing questions for conference tomorrow, but I'm so antsy tonight! I keep getting distracted by thoughts of - you guessed it - food. I figured I might as well do something productive with my distractability and write a blog (wow, is that twisted or what? Someday I'll learn how to REALLY procrastinate).

I love late summer. I think I prefer this time of year to the first blush of summer - the harvest is coming out in earnest, the sun sets just a little earlier and giving off that gold light at dusk, and the smells on the breeze hint of fall, but I can still wear tank tops and sandals to class. Yep, the best of all worlds - soon it will be time for acorn squash and butternuts, but my tomatoes are finally making a real show and the fruit keeps rolling in.

A bit too much fruit, if I'm allowed to say so.

I've been attacked by pears. People have been bringing them in to work, they are selling for pennies at the farmers market, and street trees are heavy with ripe fruit. They just kept piling up, begging to be made into something delicious for my friends.

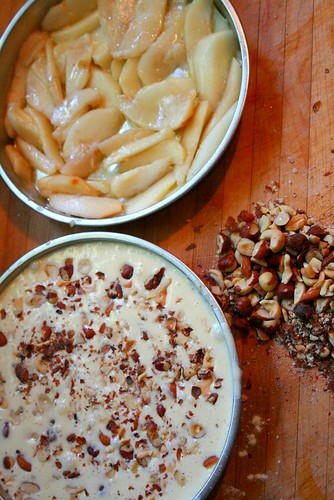
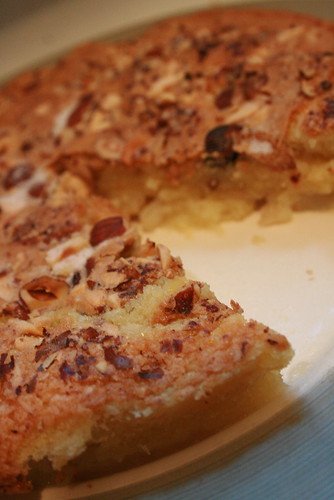
One of the best ways to use fruit that's been around for a bit too long (what I like to call "ugly fruit") is to make an upside-down cake. The process is so simple, it hardly needs a recipe. Layer your fruit (slice big fruits and keep berries whole) on the bottom of a cake pan (you could toss the fruit with a half cup of sugar, but I usually don't) and pour your favorite cake batter over it. My favorite cake recipes use salted butter or salted nuts, I just adore that sweet/salty combo that seems to go really well with really ripe fruit.

I've found a new go-to vanilla cake recipe to go with any local fruit - and it couldn't be simpler. The recipe is based on Chocolate & Zucchini's Gateau de Mamy a la Poire, but I used a bunch of nuts, salted butter, a bit less sugar, and duck eggs (I got a dozen duck eggs from the farmers market and have been experimenting with them - they worked really well in my baked goods but were a bit much eaten alone - the yolks are huge and really oily - delicious, but heavy). The result is a really rich, moist cake with a crust that's to die for (almost tastes like salted caramel - yum!)

I used pears, because, well, they weren't going to last another day, but this would be so good with sliced apples, peaches, plums, or any berry you've got. This cake ended up being a right-side up cake, because the top layer of cake got so deliciously crispy that I couldn't bear leaving it under the cake and risk letting it get too moist. Presenting, a delicious upside-down upside-down cake. A definite crowd pleaser.

Enjoy these days when we're drowning in fruit - and eat a piece of this cake out on the porch at dusk! Be well, eat well, and come back soon.


Right-Side Up Pear Cake

1 stick salted butter, melted
5 large pears (or any other fruit you've got!)
1/2 cup sugar
2 duck eggs (or 3 large chicken eggs)
1/2 cup flour
1 tsp vanilla extract
1/2 cup mixed nuts (I used roasted & salted cashews, hazelnuts, almonds, and pecans)
2 tsp baking powder

Preheat the oven to 350°F.

Slice fruit and arrange on bottom of 8 inch cake pan (I doubled the recipe and made two in the pics above - the recipe as written makes one cake).

In a large bowl with a whisk or using a stand-mixer with the paddle attachment, blend the sugar with the eggs for about a minute. Add in the flour, vanilla and baking powder, and blend well. Pour in the butter, and blend for another minute. Pour batter over fruit and top with mixed nuts. Bake for 35 minutes or until a toothpick inserted into the center comes out clean.

Let the cake cool for a few minutes. Invert it on a plate (the fruit side will be on top). If any bit of fruit has stuck to the bottom of the pan, simply scrape them and place them back where they belong on the cake. Use a second plate to invert the cake again (the fruit side will then be at the bottom). Let cool and serve slightly warm or at room temperature.

Tuesday, September 16, 2008

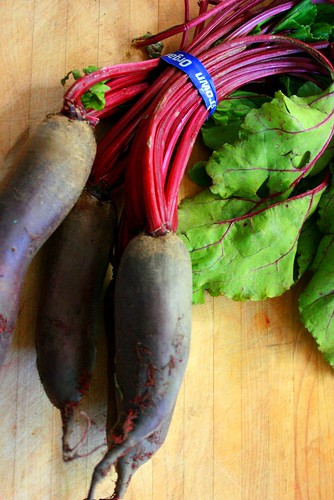
Finally! A Blog and a Bunch of Beets


I guess I knew this would happen. I had wanted to start a food blog a long time ago, and when I found myself with a bit of free time this summer, it became a reality. The problem (if you can call it that) is that all but the tiniest bits of that free time are now a distant memory, and I have gone a bit too long without a new post.

And it's not only that I don't have time to blog, I actually don't have much time to cook! As you could probably imagine, this is hard for me. I've been grabbing raw fruits, veggies, hard boiled eggs, and more cashew butter sandwiches than any one person needs to eat in a lifetime. Despite the monotony, I suppose if there was ever a time to eat mostly raw fruits and veggies it's in September in Portland. The farmers markets are overflowing with late summer goods, my garden is finally producing a solid round of tomatoes, and all of the fruit trees in my neighborhood are full of fruit.

In short, I'm not suffering for lack of good food. However, call me picky, but a photo of an apple and a few pieces of bread does not a successful blog make. But don't think that this is the end of Lemonbasil. Oh, no, my parents love this blog far too much for me to pack it up (hi guys). I'm just going to be aiming for two blogs a week, and not feel stressed that I haven't kept up with the greats of the blog world. I still bake for my friends most weekends, and I can't go too long without experimenting with some new recipe. Who knows? Perhaps I'll become an expert in how to cook with fresh, local foods in under ten minutes. Top that, Rachel Ray.

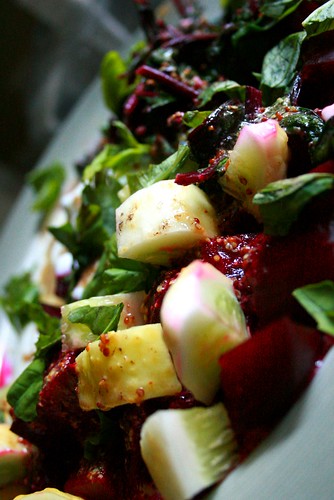
Life is really sweet right now, it's just very busy. And you know what every busy person needs... more fresh, local, fruits and vegetables! Here's a delicious salad I made from roasted cylinder beets and lemon cucumbers I got at the farmers market, topped with a cumin vinaigrette (inspired by this recipe). On the side are the beet greens sauteed in olive oil and garlic, with some fresh whole milk yogurt. Yum. I wish I had taken a picture of my plate when I was done - the beets and yogurt left a beautiful pink swirl. I admit it, I may not have much time to cook these days, but I still play with my food!

Be well, eat well, and enjoy the sun while it lasts.

Saturday, September 6, 2008

Penny Pinching with Roasted Vegetable Bread Soup


Its another one of those weeks. I'm scrounging around the kitchen trying to feed myself for a few more days on the random odds and ends of the kitchen. What with school starting, buying textbooks, some auto mishaps that needed immediate attention, and rent, I'm pulling out the old bag of tricks to stretch my food budget.

Somehow, this always comes back to a loaf of stale bread. It might just be coincidence, but it seems every time I go through one of these "Let's see how long I can go without heading to the store" moods, I'm left staring at a loaf of bread on the shelf, long past it's fresh sandwich slice days. I don't eat a lot of bread, and everyone in the house buys their own (we're pretty independent eaters in general), so there is inevitably a loaf of bread past its prime in the cupboard at any given moment.

Last time I had this problem, I made a delicious panzanella, but I've been living off salads recently and wanted something a bit more filling. I've picked up this habit of making a roast chicken every Sunday night, and using it throughout the week, from curries to chicken salad to sandwiches, and I had a really great broth from last week's bird. Why not make a soup? At first I was going to just make some croutons out of the bread to put on top of a bowl of soup (french-onion style) but then I thought, why not make a bread soup?

This probably is not the traditional way to make a bread soup, because I added the bread cubes at the beginning and not at the very end, but this gave the soup a thick, satisfying texture. The bread acted like a sponge and soaked up all the herbs and broth - so the end result tasted like a combination of thanksgiving stuffing and chicken noodle soup.

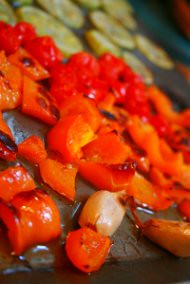
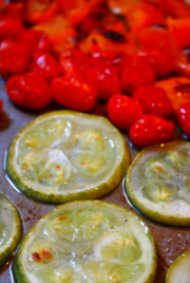
I had a few vegetable odds and ends lying around the kitchen, so I roughly chopped what I had (a bell pepper, a summer squash, whole garlic cloves, and some grape tomatoes which I left whole) and threw them under the broiler for about 6 minutes to get a bit toasty.


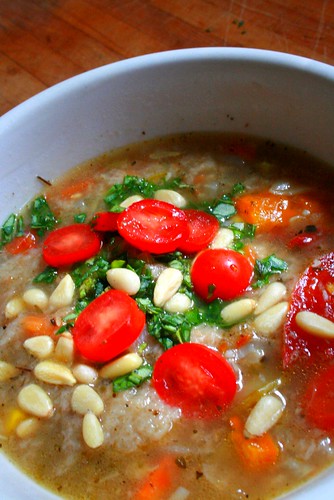
While the veggies cooked, I sauteed an onion and a diced hot cherry pepper from my garden in some olive oil. When the onions were just beginning to brown, I added two cups of chicken stock, a teaspoon each of sage, thyme, oregano, rosemary, and parsley, and a good amount of salt. I cut up about 7 slices of bread (mine was whole wheat sourdough but this would be good with most breads, I'm sure) into cubes and threw them in to the soup, brought this to a boil, and reduced to a simmer. When the veggies were browned and fragrant, I tossed them into the pot (I mashed and chopped the roasted garlic before adding it - yum!), added two cups of water, and let the whole thing simmer for about 2 hours while I went to the farmers market.

When lunchtime rolled around, I ladled a big bowl of the soup and topped it with freshly chopped basil, tomatoes, and pine nuts. So comforting, and I'm sure it would adapt to any veggies you have lying around.

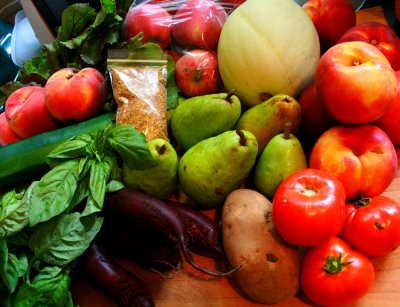
Satisfied with my week of frugality - down to the last slices of bread - I took a precious $20 to the market this morning to replenish the kitchen. I met up with some of my band mates and we sang a few songs (I pocketed five bucks for three songs - not bad!) and went off to stretch my dollars. I'm so excited about how much I got! There was a great deal at one vendor - three boxes of any fruit for 8 bucks! I walked away with 5 pears, 4 big peaches, and 6 nectarines, which will certainly last me a while. I also got some beautiful cylinder beets, a bag of apples, a huge bunch of basil, a cantaloupe, a big zucchini, a baking potato, and a bag of bee pollen (nature's superfood!) - plus it was a beautiful morning to be at the market - the skies were gray but the air was fresh and not too cold.


I'll let you know what I do with my market bounty - until then, eat well!